How to View Epoch-Based Metrics#
Sometimes, you want to analyze and visualize your model’s training progress and validation performance over multiple epochs.
In this article, we’ll show you how to view epoch-based metric data in the WebUI by reporting an
epochs metric to the Determined master via the Core API. To do this, we’ll define an epochs
metric and use it as the X-Axis label in the WebUI.
Recommended
Set Up Your Training Environment#
To begin, you’ll need a Determined cluster. If you are new to Determined AI (Determined), you can install the Determined library and start a cluster locally.
Ensure you have Docker running and then run the following command:
pip install determined

# If your machine has GPUs:
det deploy local cluster-up

# If your machine does not have GPUs:
det deploy local cluster-up --no-gpu
Note
When deploying locally, the system prompts you to set a strong password.
The command, pip install determined, installs the determined library which includes the Determined command-line interface (CLI).
Step 1: Get the Tutorial Files & Run the Experiment#
To follow along, you’ll need the tutorial files.
Create a new directory.
Access the tutorial files via the
core_api_pytorch_mnist.tgzdownload link or directly from the Github repository.
For this step, we’ll use our model_def.py script and its accompanying const.yaml experiment
configuration file.
From the directory containing our files, we’ll begin by running the following command:
det e create const.yaml . -f
We don’t have any data to plot yet, but we’ll open the Determined WebUI to see that our experiment is running.
Go to
http://localhost:8080/.Accept the default username of
determined.Click Sign In.
After signing in, create a strong password.
In the WebUI, we can select our experiment and visit the Logs tab.
Step 2: Report Epoch-Based Metrics#
In this section, we’ll define our epochs metric.
To follow along, use the
model_def_metrics.pyscript and its accompanyingmetrics.yamlexperiment configuration file.
Our script, model_def_metrics.py, is a modification of the model_def.py script. It already
reports training and validation metrics to the Determined master and contains a steps_completed
variable that is needed to plot metrics on a graph in the WebUI.
Note
For a full description of the Core API PyTorch MNIST Tutorial files, visit the Core API User Guide.
Step 2.1: Modify the Train and Validation Methods#
Our script, model_def_metrics.py, contains core_context.train. This is used to report
training and validation metrics.
However, we also want to report epoch-based metrics and to allow Determined to keep track of the specific epoch for which training loss is being reported.
To do this, we’ll modify the train() method to include
epochsas a metric. We will calculate fractional completed epochs based onbatches_completed, since this training code reports more frequently than once per epoch:
partial_epoch = batches_completed / len(training_loader)
core_context.train.report_training_metrics(
  steps_completed=batches_completed + epoch_idx * len(train_loader),
  metrics={"train_loss": loss.item(), "epochs": epoch_idx + partial_epoch},
)
Similarly, we’ll include
epochsas a metric in the reported validation metrics. This allows Determined to track the specific epoch for which the validation loss is being reported:
epochs_completed = epoch_idx + 1
core_context.train.report_validation_metrics(
   steps_completed=steps_completed,
   metrics={"test_loss": test_loss, "epochs": epochs_completed},
)
Now that we’ve reported an epochs metric, Epochs will be an available option for the X-Axis
when we view our metric data graph in the WebUI.
Step 2.2: Run the Experiment & View Epoch-Based Metrics#
Our modified script is ready to report epoch-based metrics to the Determined master.
To run our experiment, we’ll run the following command:
det e create metrics.yaml .
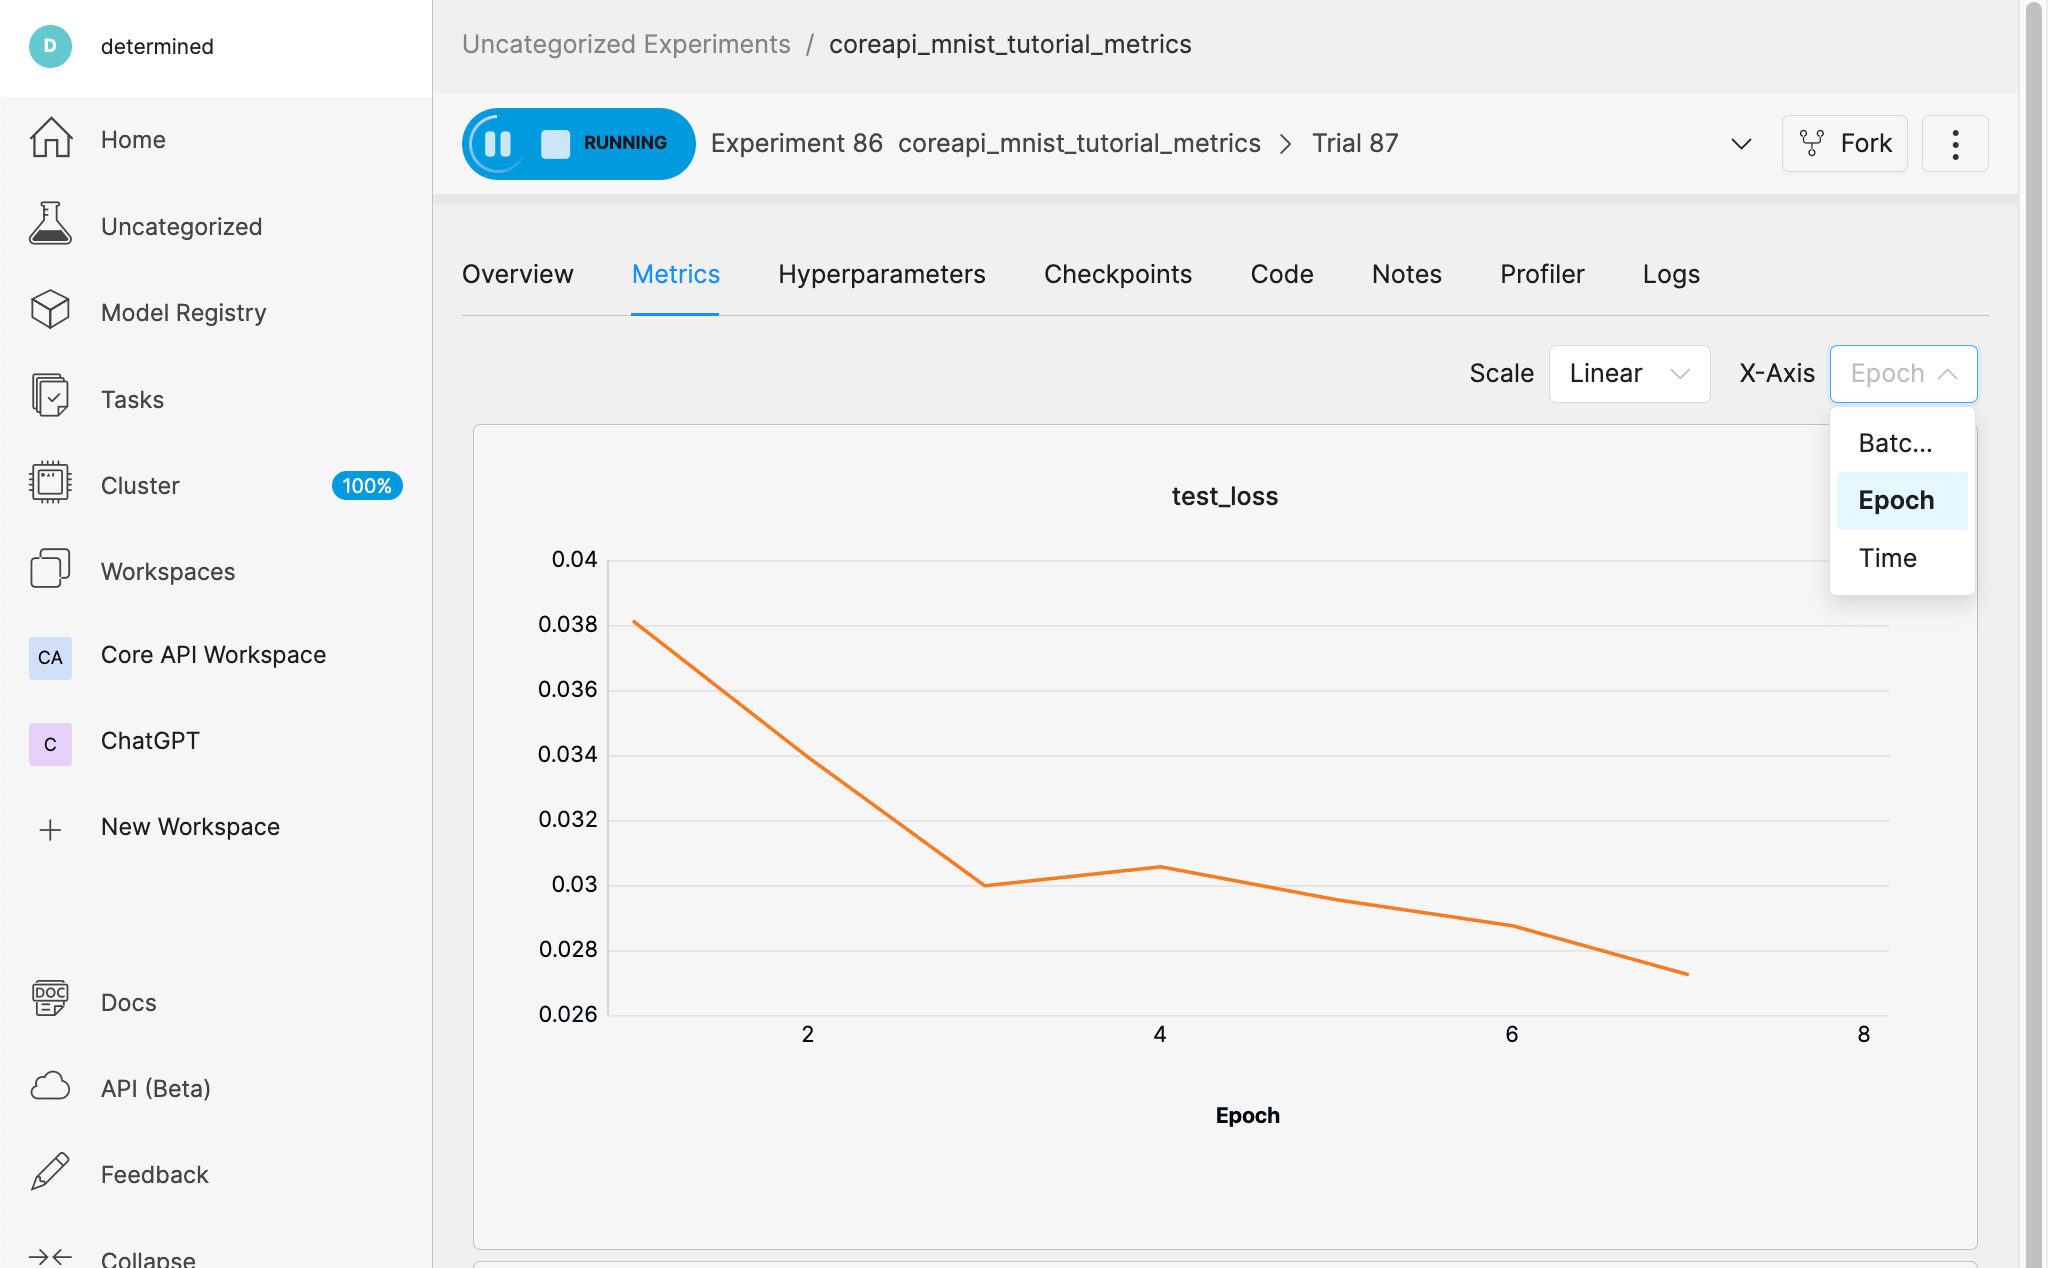
To view our epoch-based metrics, we’ll open the Determined WebUI and select our experiment.
Our experiment opens in the Overview tab.
We’ll go to the Metrics tab, select the X-Axis menu and then choose Epochs.
If we scroll down, we’ll be able to see the epoch-based metrics graph.
Summary#
In this article, you learned how to add a few lines of code to a script for the purpose of reporting epoch-based metrics in addition to training and validation metrics. You also learned how to view epoch-based metric data in the WebUI.
Next Steps#
Now you can try editing your own script for the purpose of reporting epoch-based metrics to the Determined master.
For more tutorials, visit the Tutorials to learn the basics of working with Determined and how to port your existing code to the Determined environment.