Zapier#
This section will walk through the steps needed to set up Zapier webhook to receive updates from Determined.
The steps to set up Zapier webhook are:
Creating a Zap with Webhook#
First, you need to create a Zap with webhook. Visit Zapier, signup if you haven’t already, and click on the Create Zap button.
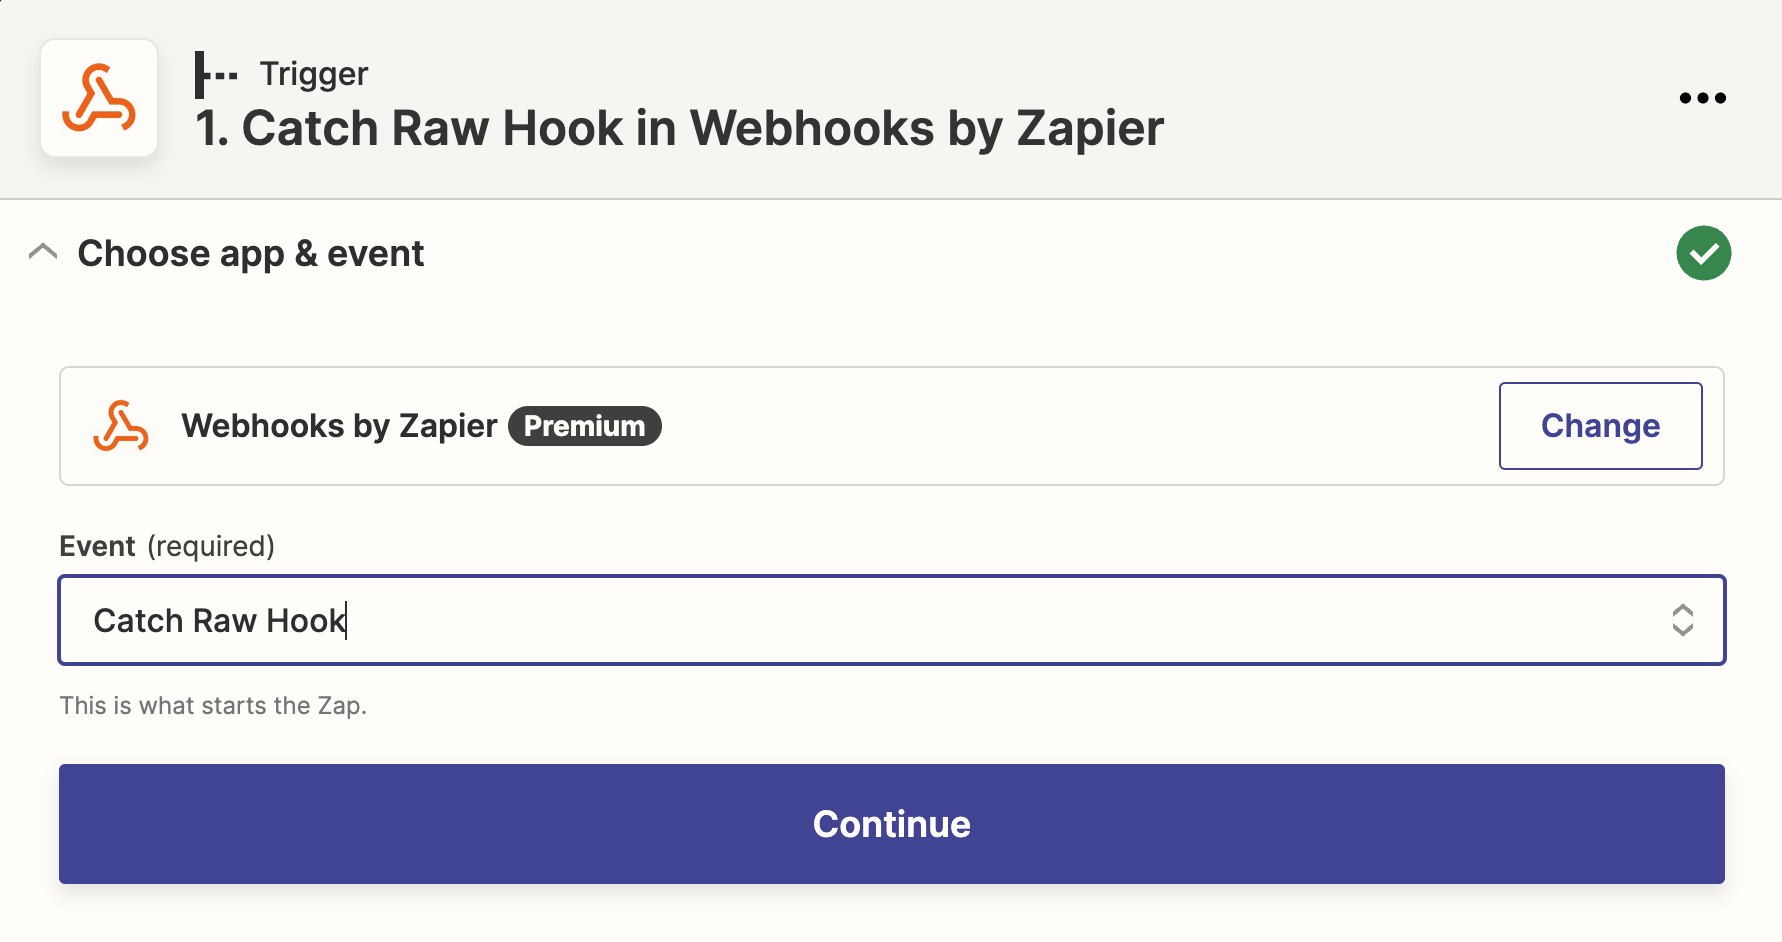
Select Webhooks by Zapier as trigger Catch Raw Hook as event. Using Catch Raw Hook intead of Catch Hook because headers are needed to verify each webhook request.
Note
You need to upgrade to premium account to access Webhooks by Zapier
Setting up the Webhook in Determined#
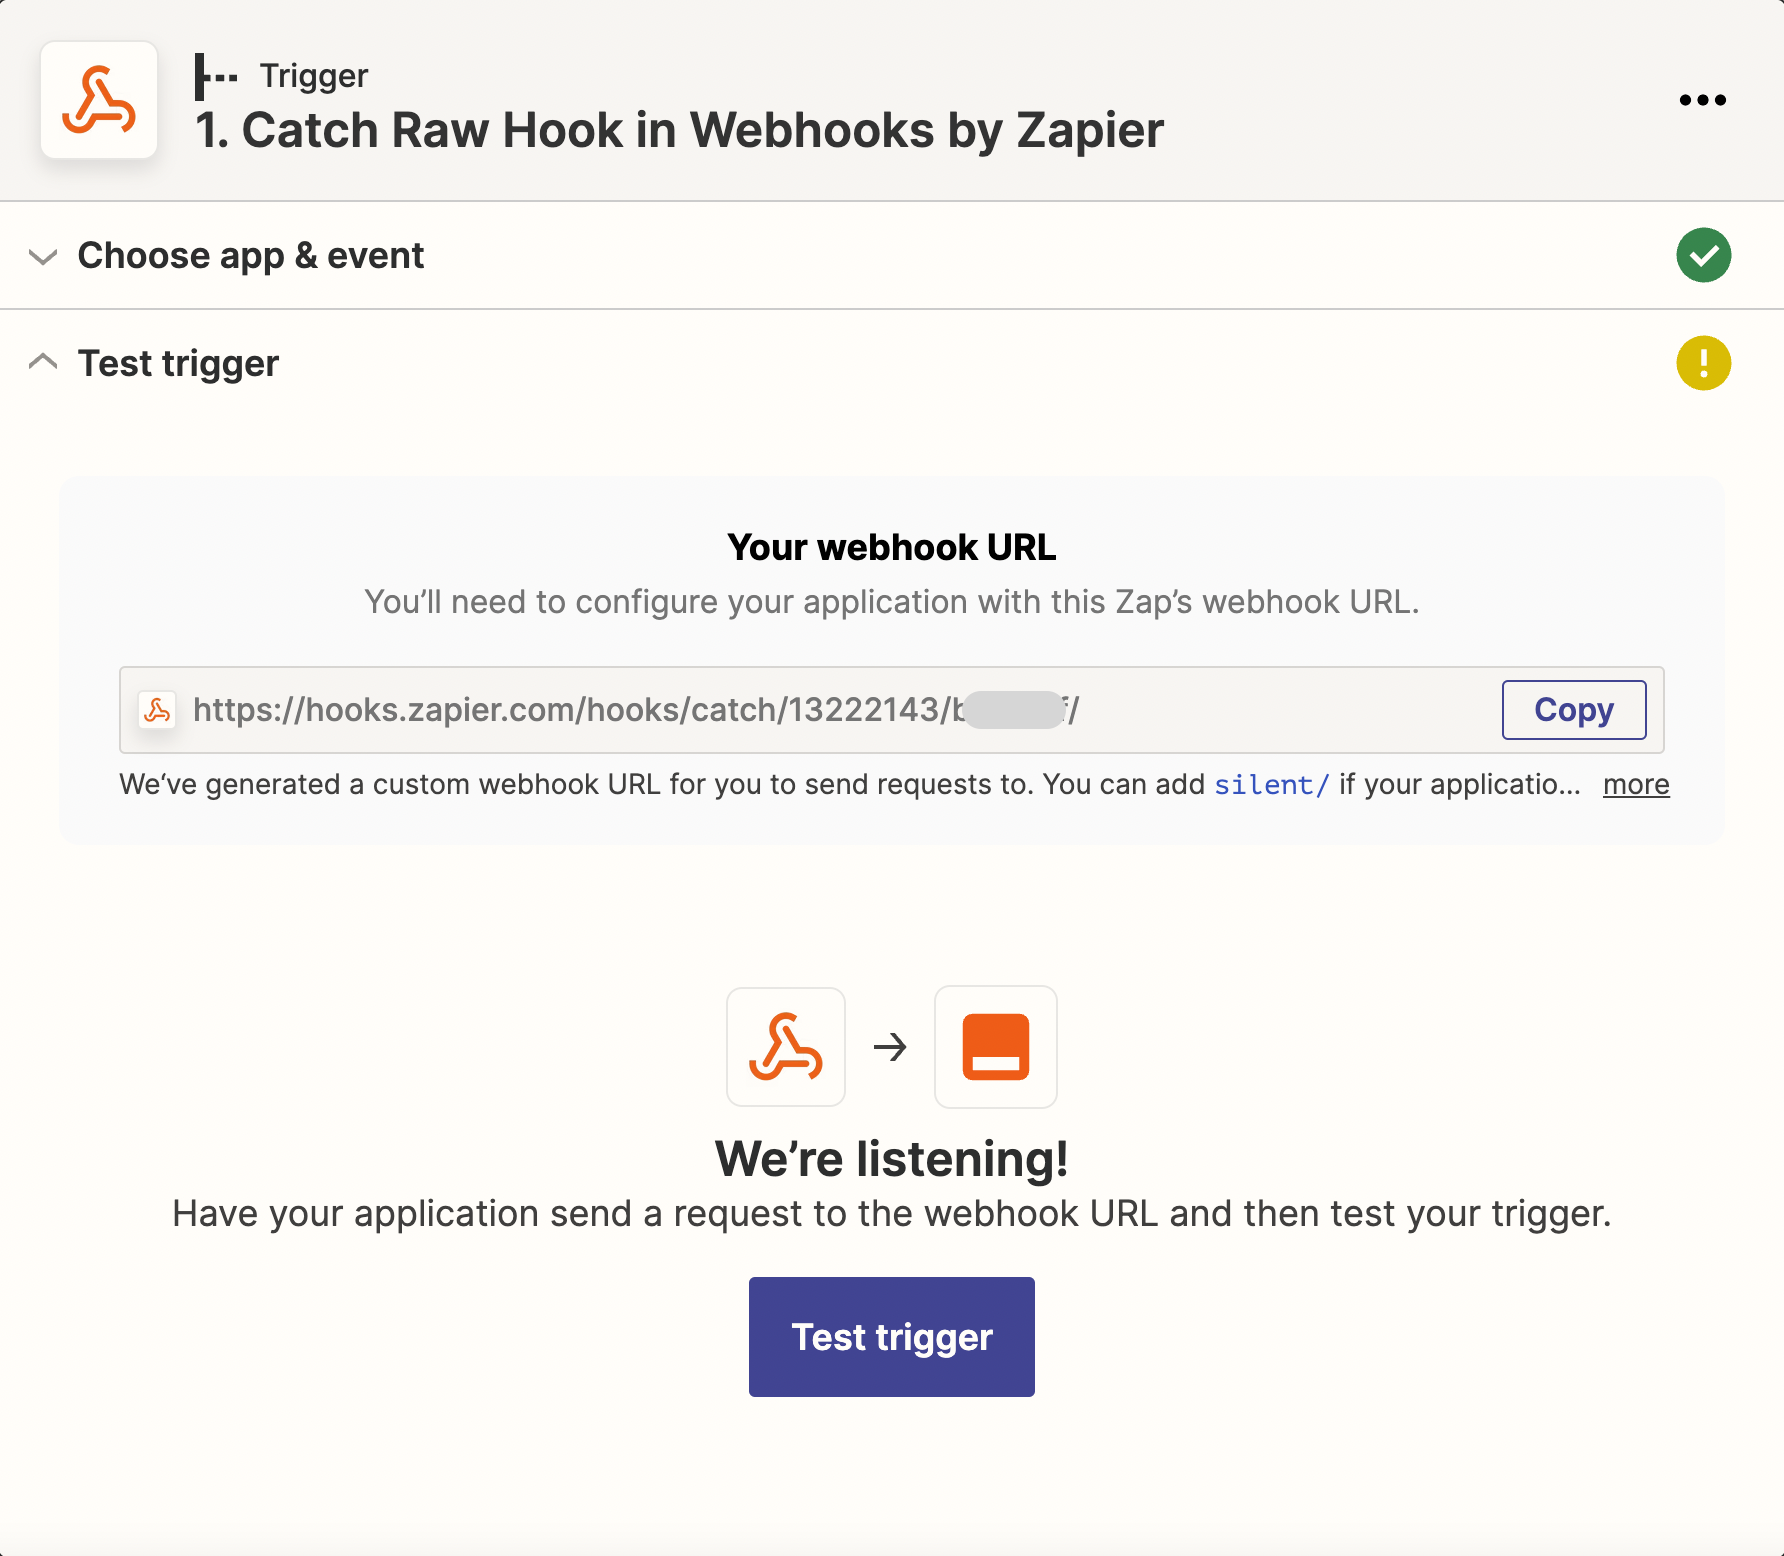
Then, you need to create a webhook in Determined using the Webhook URL from Zapier.
Navigate to /det/webhooks or click on the “Webhooks” item in navigation side menu, then click
the New Webhook button in the top right corner of the page.
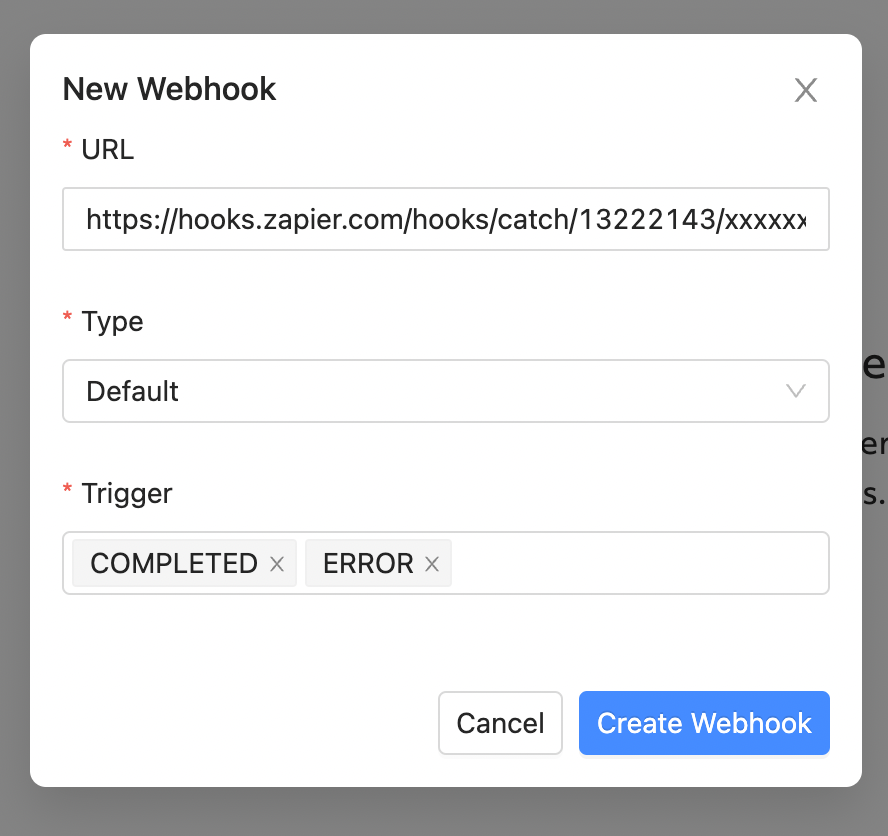
Paste the Webhook URL that was copied from Zapier in the URL field. Select Default for the webhook type and then select the triggers that you want to receive notifications for. Finally, select Create Webhook and your webhook will be created.
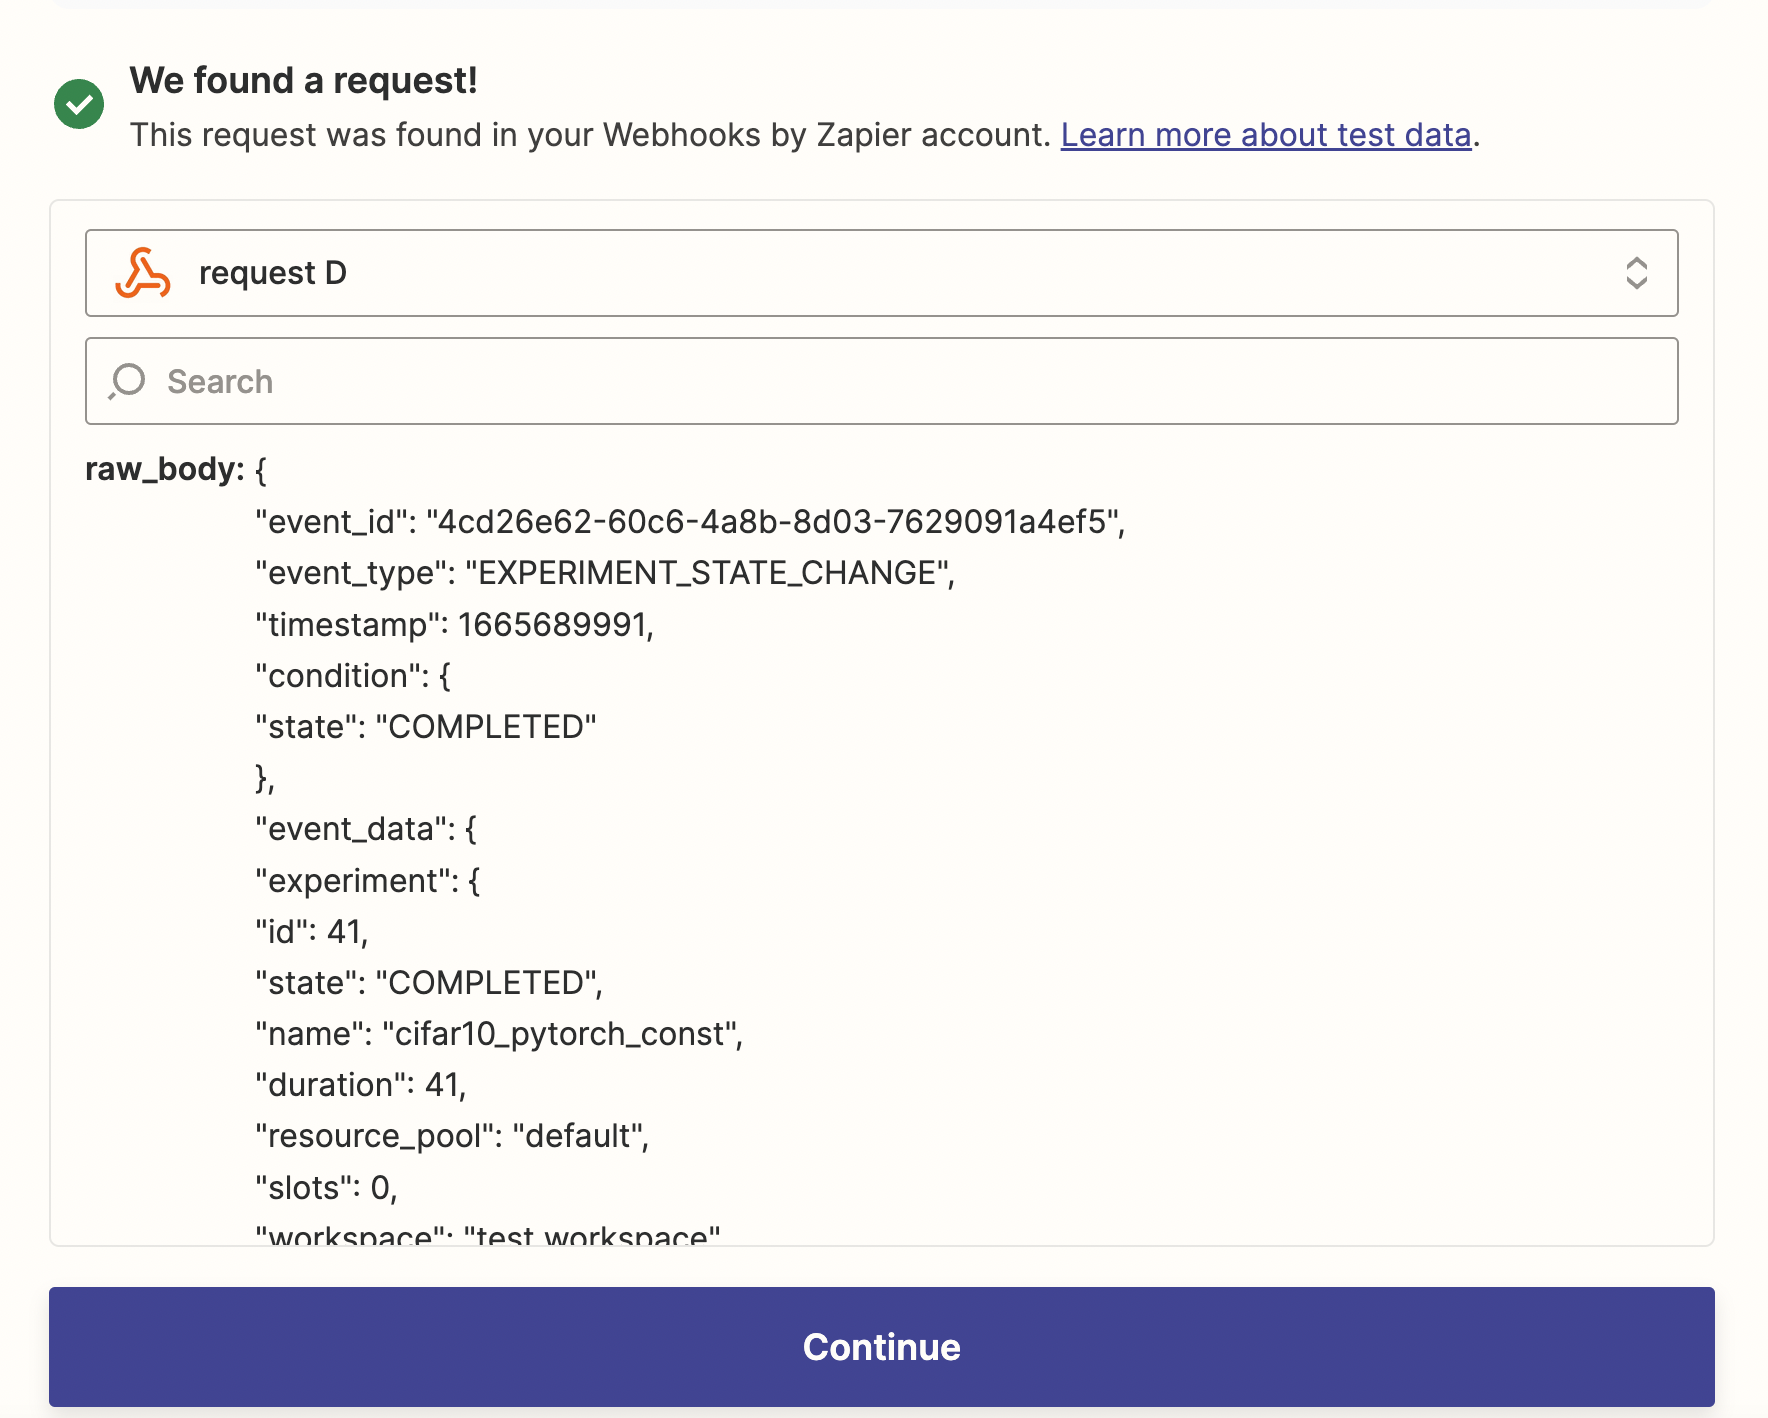
Testing the Webhook#
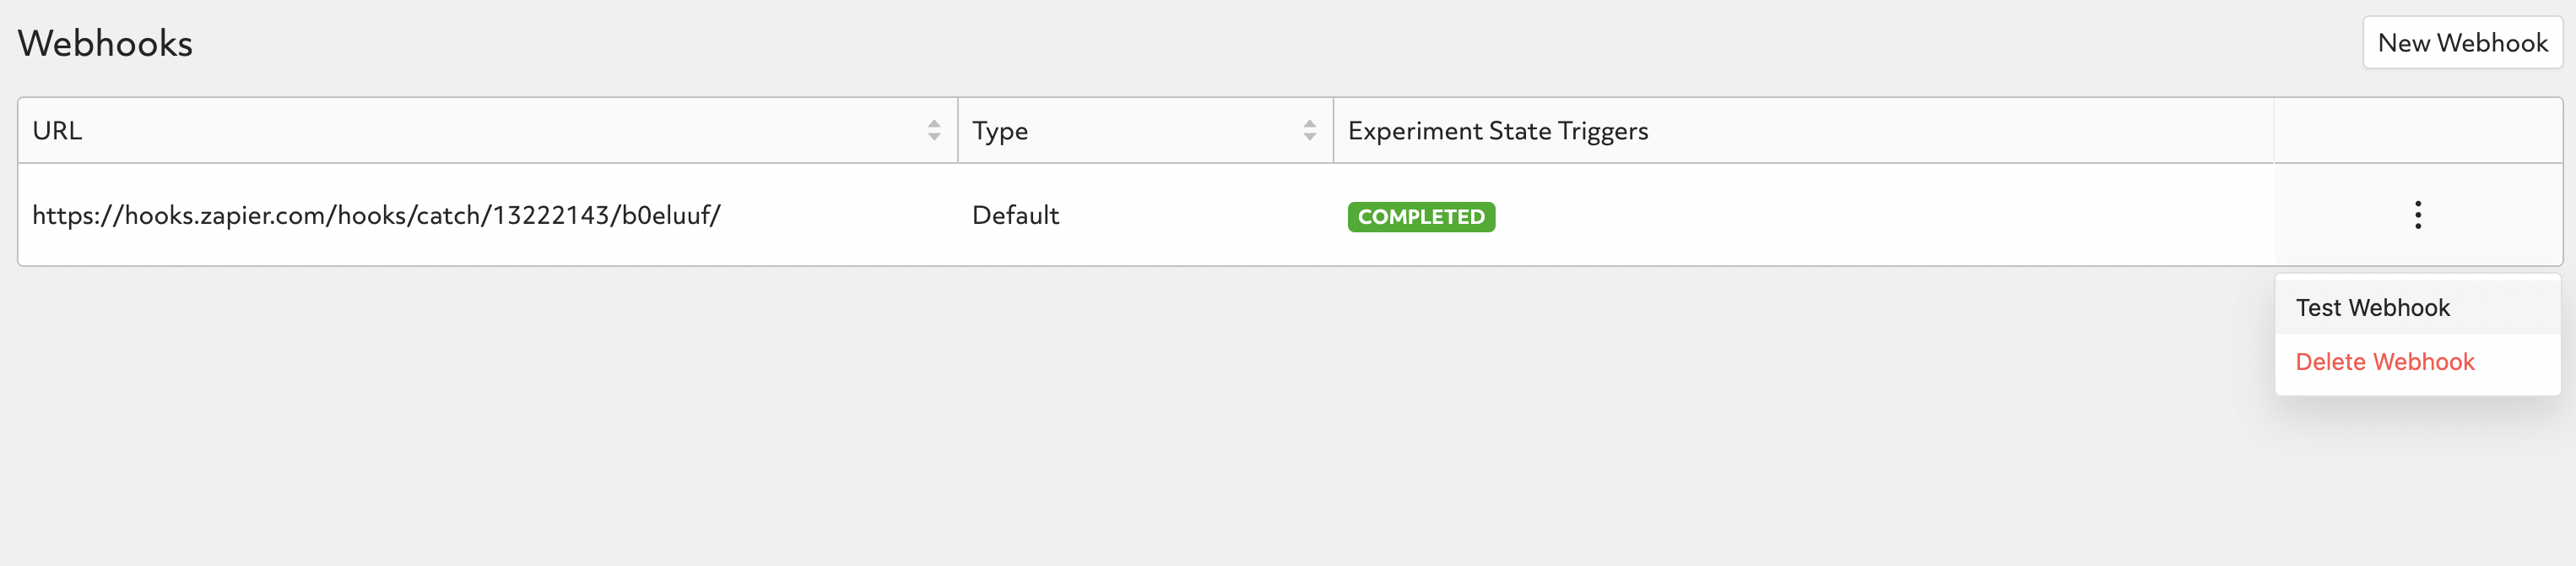
To send a test payload, click on the triple dots on the right of webhook record and click on Test Webhook.
Then navigate back to Zapier and click on Test Trigger, then you should be able to see the test request.
Verifing the Signature#
Refer to Security and Signed Payload for the details behind verifing signature.
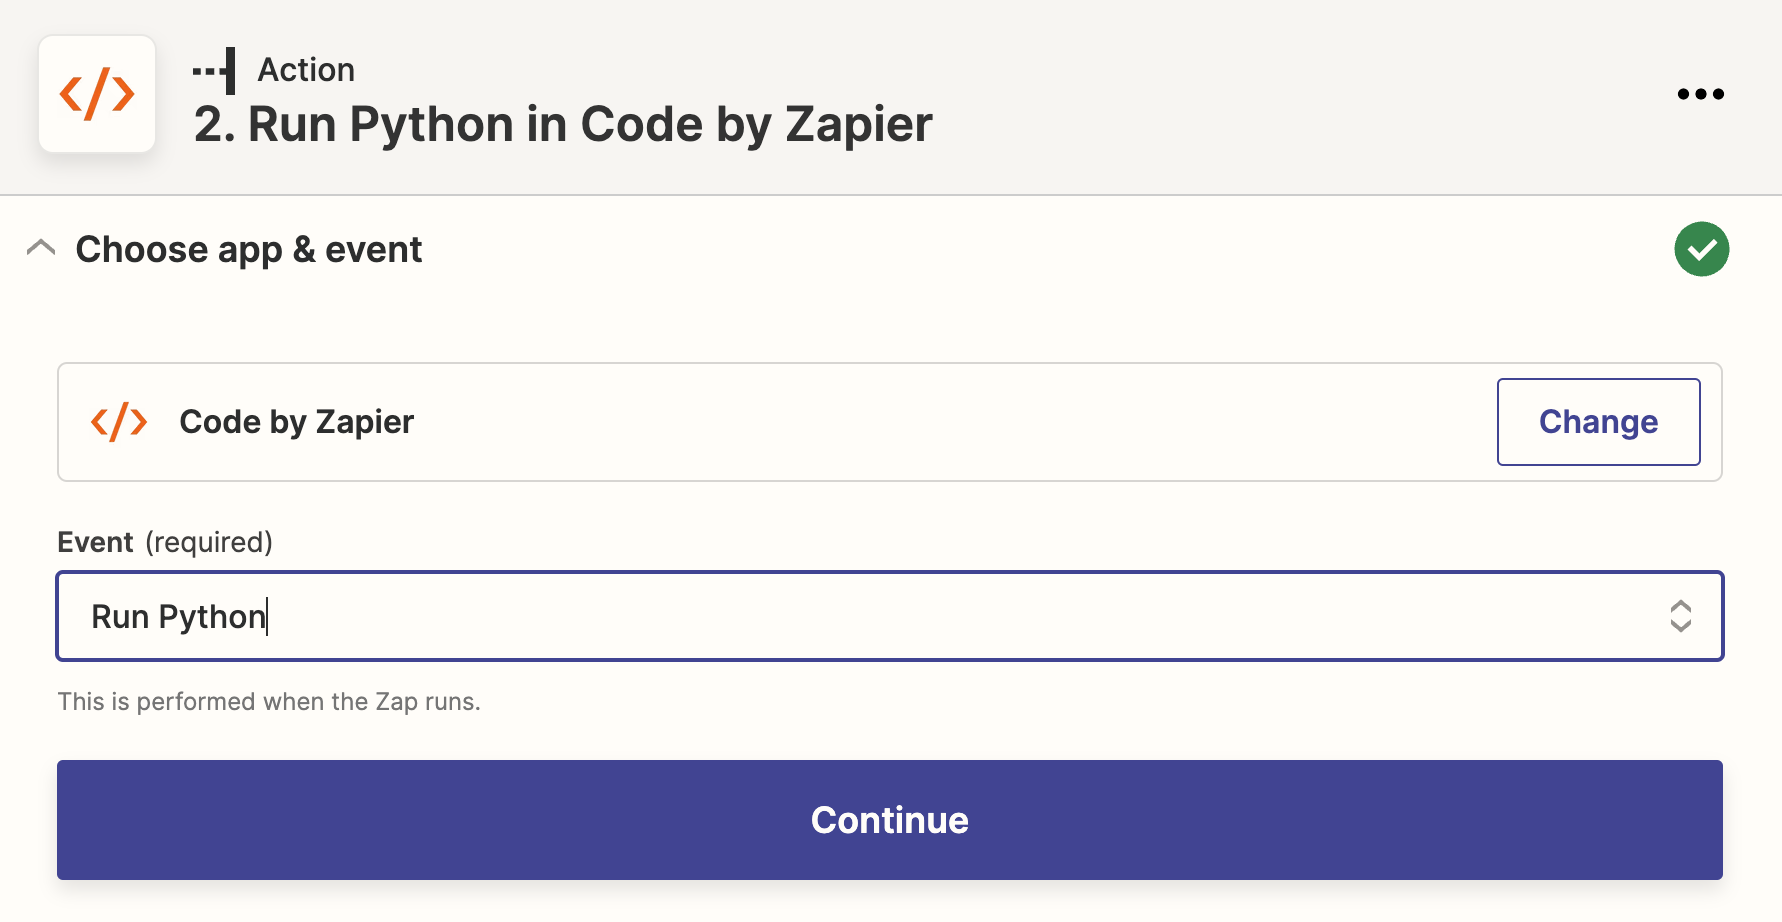
In Zapier, you can use Code by Zapier to compute signature based on payload and timestamp, then compare it with the signature in the request to verify each request.
Add a new action and choose Code by Zapier, select Run Python as an example.
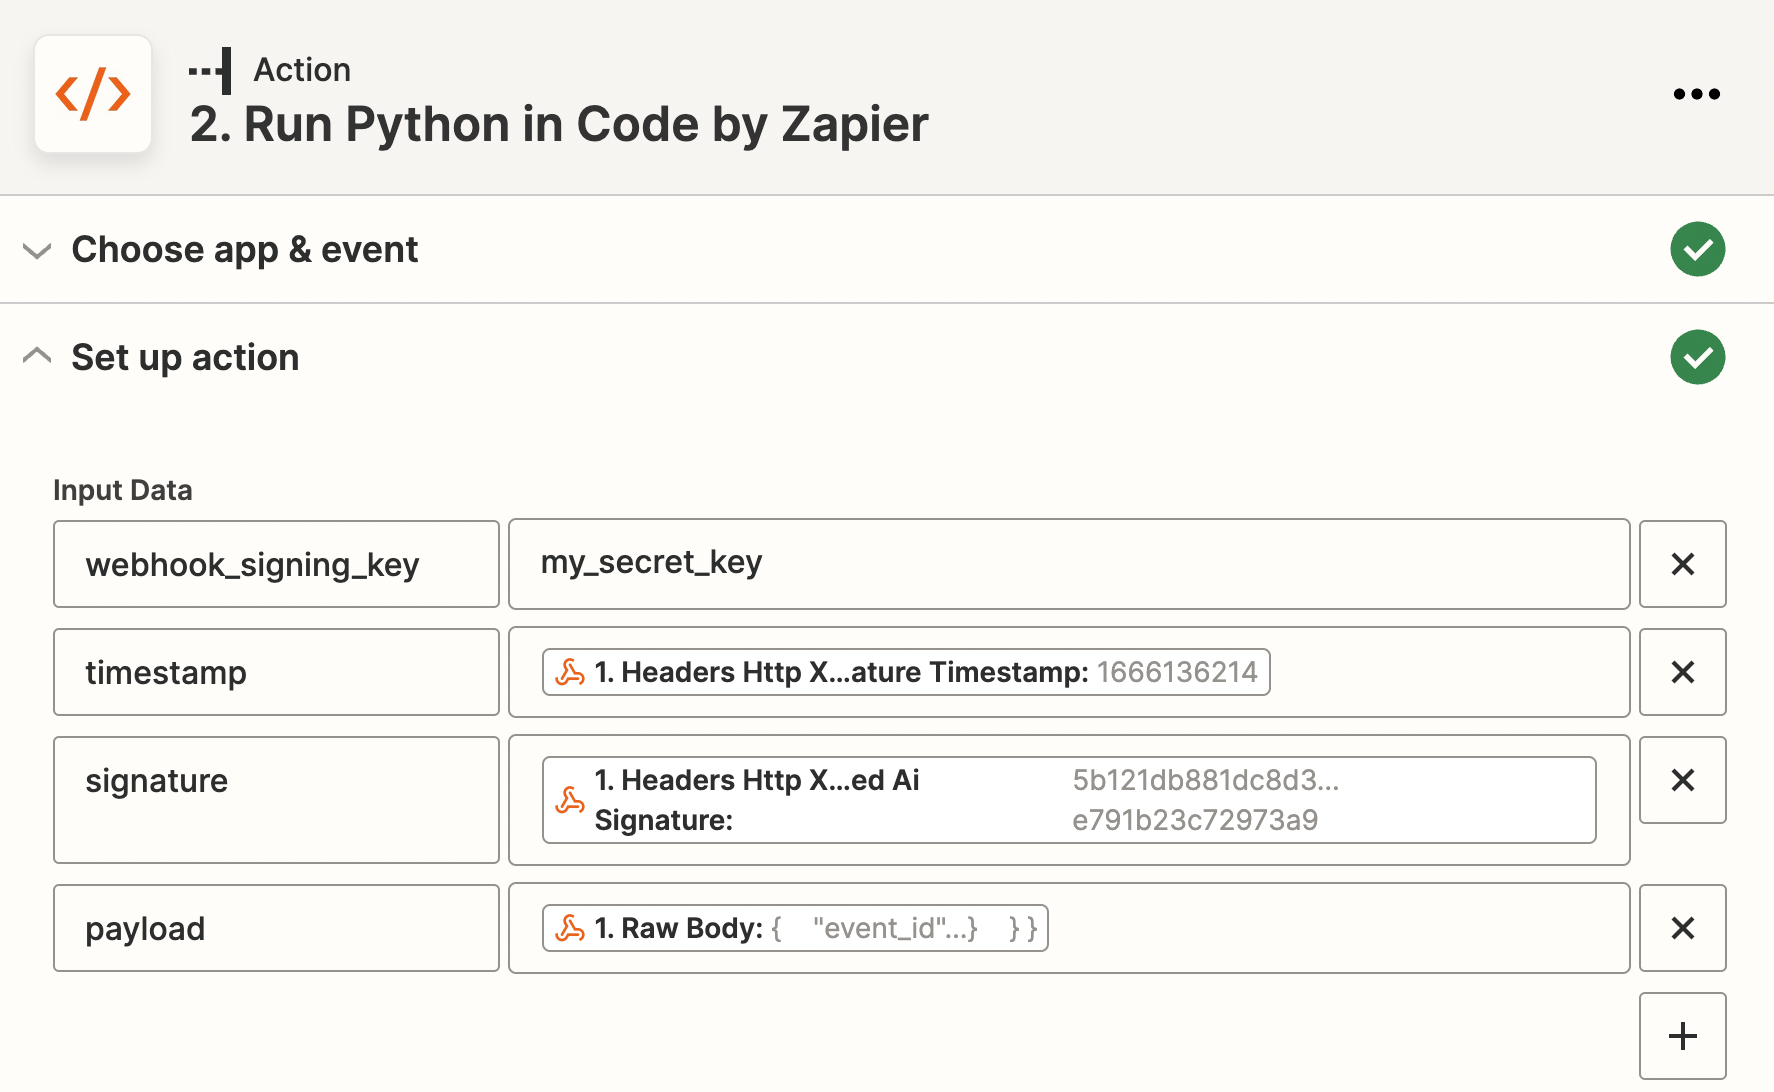
Construct input data as following:
webhook_signing_key: match the
webhook_signing_keyin Determined.timestamp:
X-Determined-AI-Signature-Timestampfrom request header.signature:
X-Determined-AI-Signaturefrom request header.payload: raw body of request.
Input code as following:
import hmac, hashlib, json

signing_key = input_data['webhook_signing_key']
timestamp = input_data['timestamp']
signature = input_data['signature']
payload = json.loads(input_data['payload'])

calculated_signature = hmac.new(signing_key.encode(), f"{timestamp},{payload}".encode(), digestmod=hashlib.sha256).hexdigest()

if calculated_signature == signature:
    return {"result": "PASS", "payload": payload}
return {"result": "Signature cannot be verified, request might not be legit"}
Under Test Action, test the code above, you should be able to see that verification has passed.

Configuring Destination#
Finally, you can configure where to proceed under each scenario by adding more actions. For example, send out an alert when verification fails, or send out an email with experiment information when verification pass.