Create Your First Experiment#
Follow these steps to see how to run your first experiment.
Prerequisites#
You must have a running Determined cluster with the CLI installed.
To set up a local cluster, visit Quick Installation.
To set up a remote cluster, visit the Installation Guide where you’ll find options for On Prem, AWS, GCP, Kubernetes, and Slurm.
Concepts#
Single-Trial Run: A single-trial experiment (or run) allows you to establish a baseline performance for your model. Running a single trial is useful for understanding how your model performs with a fixed set of hyperparameters. It serves as a benchmark against which you can compare results from more complex searches.
Multi-Trial Search: A multi-trial experiment (or search) allows you to optimize your model by exploring different configurations of hyperparameters automatically. A search systematically tests various hyperparameter combinations to find the best-performing configuration. This is more efficient than manually tuning each parameter.
Remote Distributed Training: Remote distributed training jobs enable you to train your model across multiple GPUs or nodes in a cluster, significantly reducing the time required for training large models or datasets. This approach allows for efficient scaling and management of resources, particularly in more demanding machine learning tasks.
Execute and Compare Experiments#
In this section, we’ll first execute a single-trial run before running a search. This will establish the baseline performance of our model and will give us a reference point to compare the results of our multi-trial search. Finally, we’ll run a remote distributed training job.
Follow these steps to train a single model for a fixed number of batches, using constant values for all hyperparameters on a single slot. A slot is a CPU or CPU computing device, which the Determined master schedules to run.
Note
To execute an experiment in a local training environment, your Determined cluster requires only a single CPU or GPU. A cluster is made up of a master and one or more agents. A single machine can serve as both a master and an agent.
Create the Experiment
Download and extract the tar file:
mnist_pytorch.tgz.Open a terminal window and navigate to the directory where you extracted the tar file.
The
const.yamlfile is a YAML-formatted configuration file that corresponds to an example experiment.Create an experiment that specifies the
const.yamlconfiguration file by typing the following CLI command.det experiment create const.yaml .
The final dot (.) argument uploads all of the files in the current directory as the context directory for your model. Determined copies the model context directory contents to the trial container working directory.
View the Run
To view the run in your browser:
Enter the following URL: http://localhost:8080/. This is the cluster address for your local training environment.
Accept the default username of
determined, and click Sign In. You’ll create a strong password in the next section.
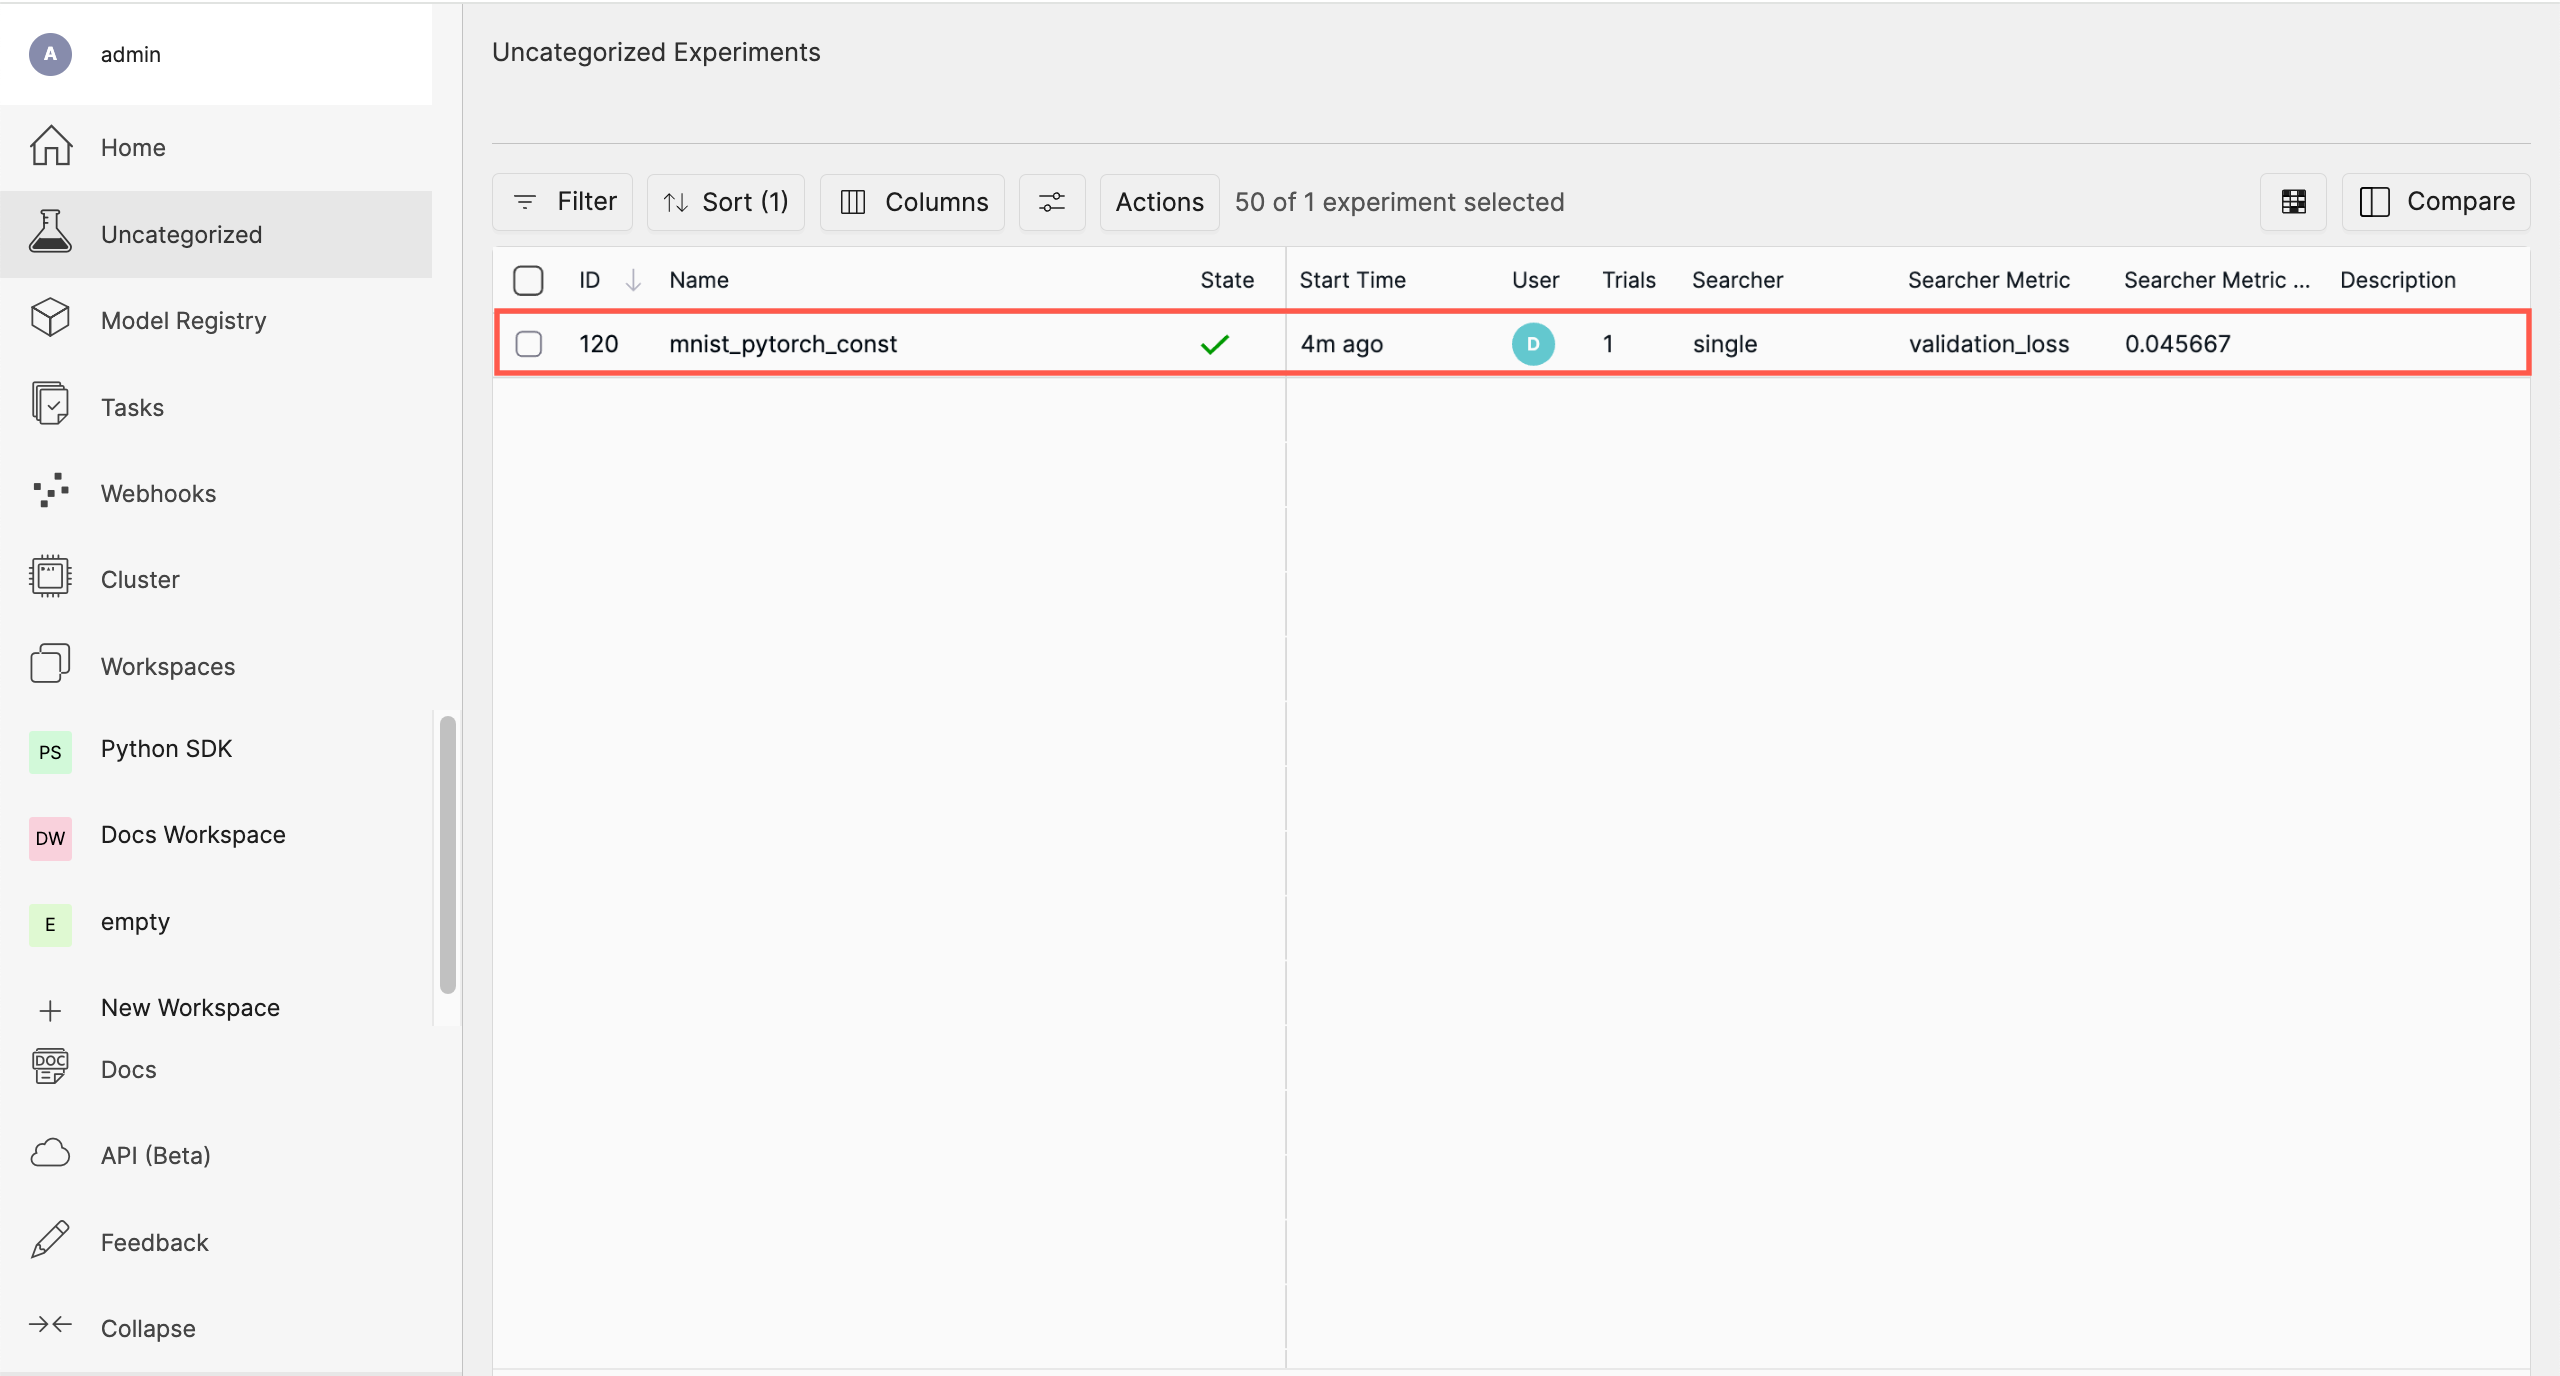
Navigate to the home page and then visit your Uncategorized experiments.
Determined displays all runs in a flat view for ease of comparison.

Selecting the experiment displays more details such as metrics and checkpoints. With this baseline, we can now execute a multi-trial experiment, or “search”.
Create a Strong Password
Select your profile in the upper left corner and then choose Settings.
Edit the Password by typing a strong password.
Select the checkmark to save your changes.
If you are changing your password, the system asks you to confirm your change. The system lets you know your changes have been saved.
Once you have established a baseline performance by creating your single-trial experiment (or “run”), you can create a multi-trial experiment (or “search”) and compare the outcome with the baseline.
To do this, first create a search.yaml configuration file for executing the multi-trial
search.
Prepare the configuration file.
Copy the following code and save the file as
search.yamlin the same directory as yourconst.yamlfile:name: mnist_pytorch_search hyperparameters: learning_rate: type: log base: 10 minval: 1e-4 maxval: 1.0 n_filters1: type: int minval: 16 maxval: 64 n_filters2: type: int minval: 32 maxval: 128 dropout1: type: double minval: 0.2 maxval: 0.5 dropout2: type: double minval: 0.3 maxval: 0.6 searcher: name: random metric: validation_loss max_trials: 20 smaller_is_better: true entrypoint: python3 train.py
Create the Search
Once you’ve created the new configuration file, you can create and run the search using the following command:
det experiment create search.yaml .
This will start the search, and Determined will run multiple trials, each with a different combination of hyperparameters from the defined ranges.
Monitor the Search
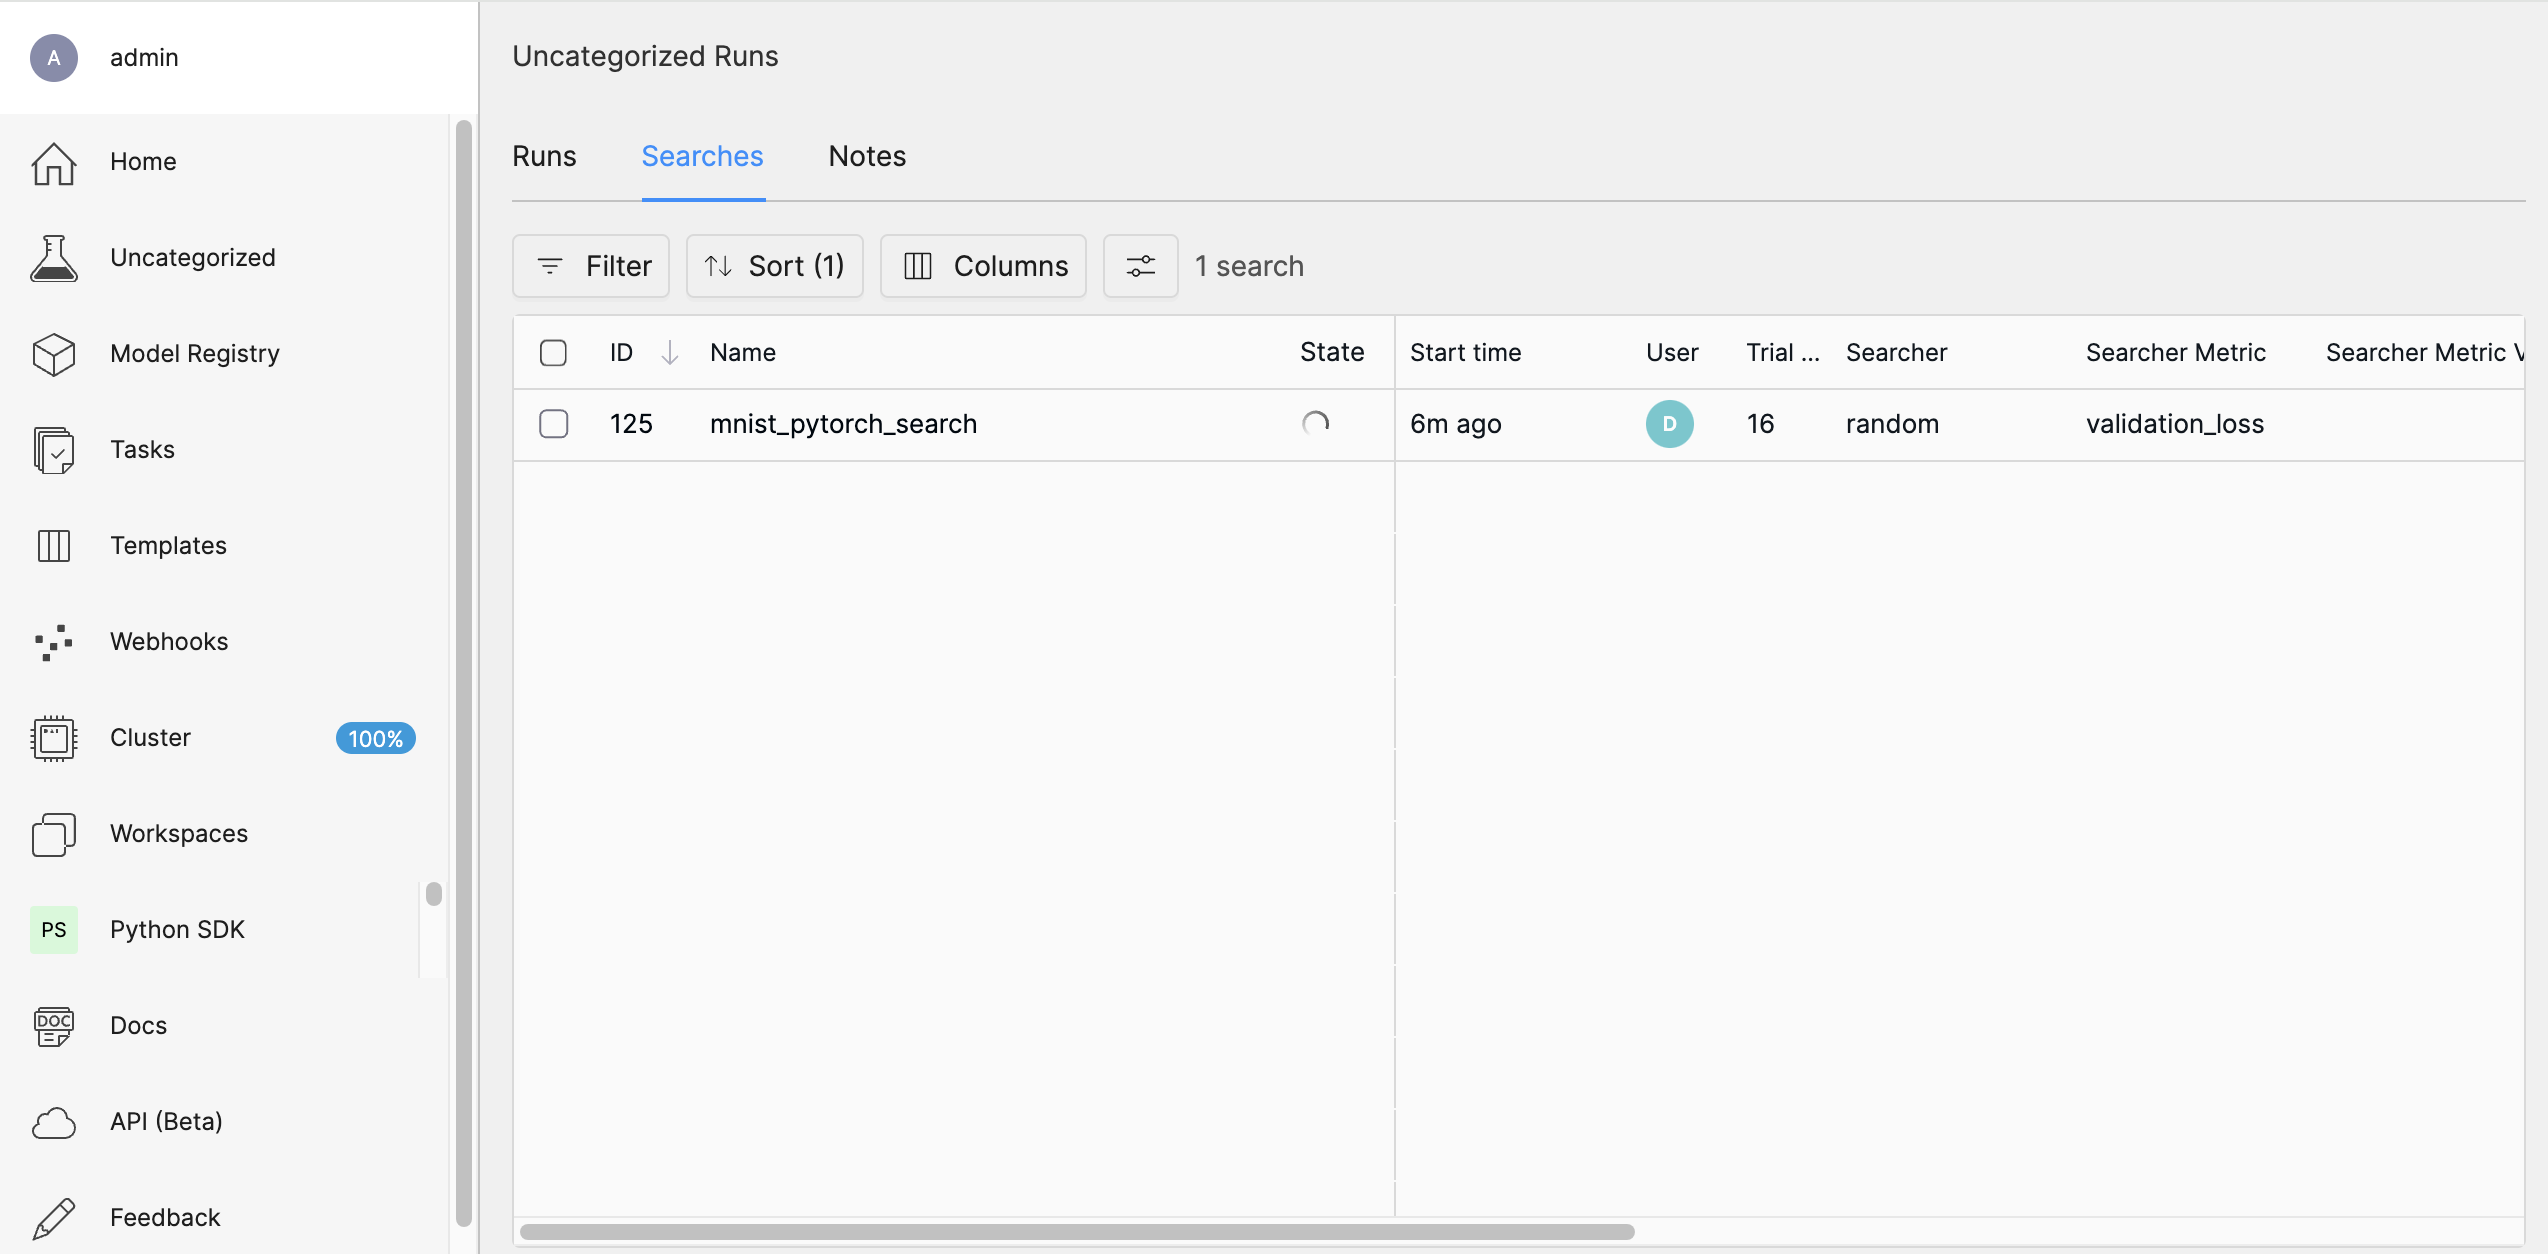
In the WebUI, navigate to the Searches tab to monitor the progress of your search. You’ll be able to see the different trials running, their status, and their performance metrics. Determined also offers built-in visualizations to help you understand the results.

Analyze the Results
After the search is complete, you can review the best-performing trials and the hyperparameter configurations that led to them. This will help you identify the optimal settings for your model.
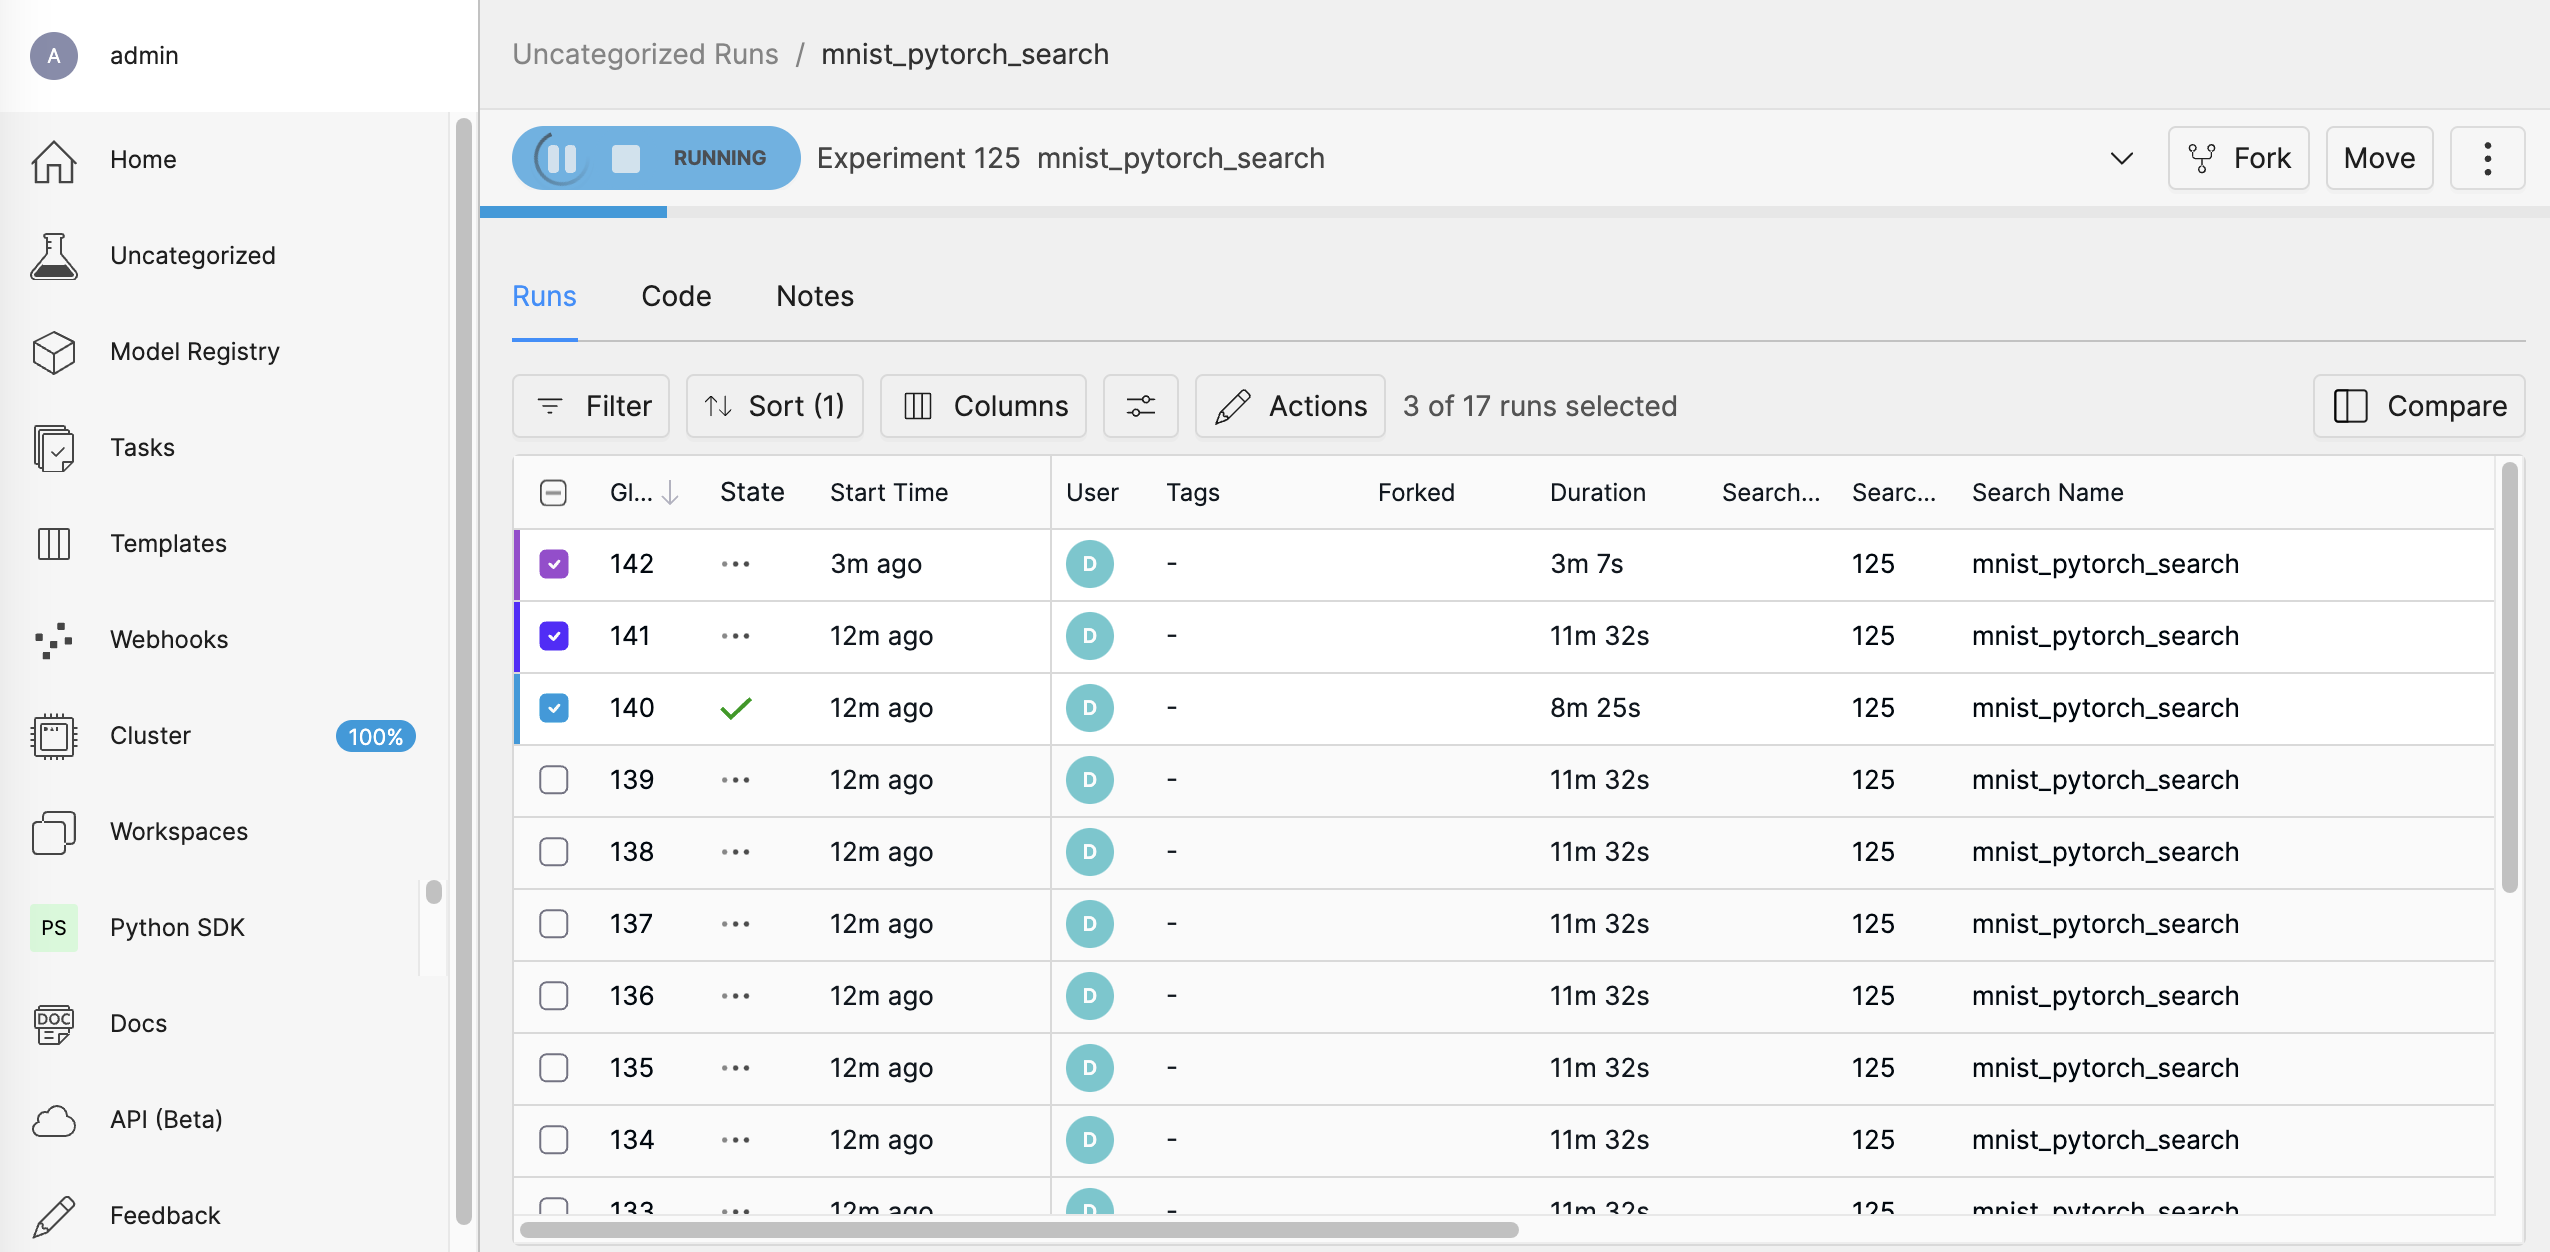
Selecting mnist_pytorch_search takes you to the “runs” view where you can choose which runs you want to compare.

Run a remote distributed training job.
Note
To run a remote distributed training job, you’ll need a Determined cluster with multiple
GPUs. In distributed training, A cluster is made up of a master and one or more agents. The
master provides centralized management of the agent resources. By default, the
Slots Per Trial value is set to 1 which disables distributed training.
Download and extract the tar file:
mnist_pytorch.tgz.Open a terminal window and navigate to the directory where you extracted the tar file.
Using your code editor, examine the
distributed.yamlfile. Notice theresources.slots_per_trialfield is set to a value of8:resources: slots_per_trial: 8
This is the number of available GPU resources. The
slots_per_trialvalue must be divisible by the number of GPUs per machine.If necessary, use your code editor to change the value to match your hardware configuration.
Sign in to your remote instance of Determined:
Enter the URL of your remote instance: http://<ipAddress>:8080/.
Sign in using your username and password.
To connect to the Determined master running on your remote instance, set the remote IP address and port number in the
DET_MASTERenvironment variable:export DET_MASTER=<ipAddress>:8080
To create and run the experiment, run the following command, replacing
<username>with your username.det -u <username> experiment create distributed.yaml .
The system will ask for your password.
In your browser, navigate to the home page and then visit Your Recent Submissions.
Select the experiment to display the experiment’s details such as Metrics. Notice the loss curve is similar to the locally-run, single-GPU experiment but the time to complete the trial is reduced by about half.
Learn More#
Want to learn how to adapt your existing model code to Determined?
The behavior of an experiment is configured via an experiment configuration, or YAML, file. A configuration file is typically passed as a command-line argument when an experiment is created with the CLI.
Visit the Experiment Configuration Reference for a complete description of the experiment configuration file.
Visit the Core API User Guide for a walk-through of how to adapt your existing model code to Determined using the PyTorch MNIST model.
Deep Dive Quick Start
To learn more about how to change your configuration settings to run a distributed training job on multiple GPUs, visit the Quickstart for Model Developers.
More Tutorials
For more quick-start guides including API guides, visit the Tutorials.