Quick Start Guide
This guide demonstrates how to train a model, perform a hyperparameter search, and run a distributed training job, all in Determined. This guide is based on the official PyTorch MNIST example and TensorFlow Fashion MNIST Tutorial.
This guide focuses on demonstrating Determined’s features at a high level. We will lightly touch on major concepts and terminology. For a more slow-paced introduction to developing models with Determined, check out PyTorch MNIST Tutorial or TensorFlow Keras Fashion MNIST Tutorial. Or, for an even faster (but less structured) way to start using a Determined cluster without writing a model, see Commands and Shells.
Prerequisites
Access to an installation of Determined, either on your own machine or the public cloud. If you have not yet installed Determined, refer to the installation instructions.
The Determined CLI should be installed on your local machine. For installation instructions, see here. After installing the CLI, configure it to connect to your Determined cluster by setting the
DET_MASTERenvironment variable to the hostname or IP address where Determined is running.For Determined clusters installed using
det deploy local: when you run your first experiment, Determined needs to download Docker images with the dependencies needed to run deep learning workloads. This initial download can take some time, depending on the speed of your Internet connection (these images are then cached for future experiments). We suggest running the following commands to help speed up this process:
# For CPU computations
docker pull determinedai/environments:py-3.8-pytorch-1.9-lightning-1.3-tf-2.4-cpu-0.17.2

# For GPU computations
docker pull determinedai/environments:cuda-11.1-pytorch-1.9-lightning-1.3-tf-2.4-gpu-0.17.2
Preparing Your First Job
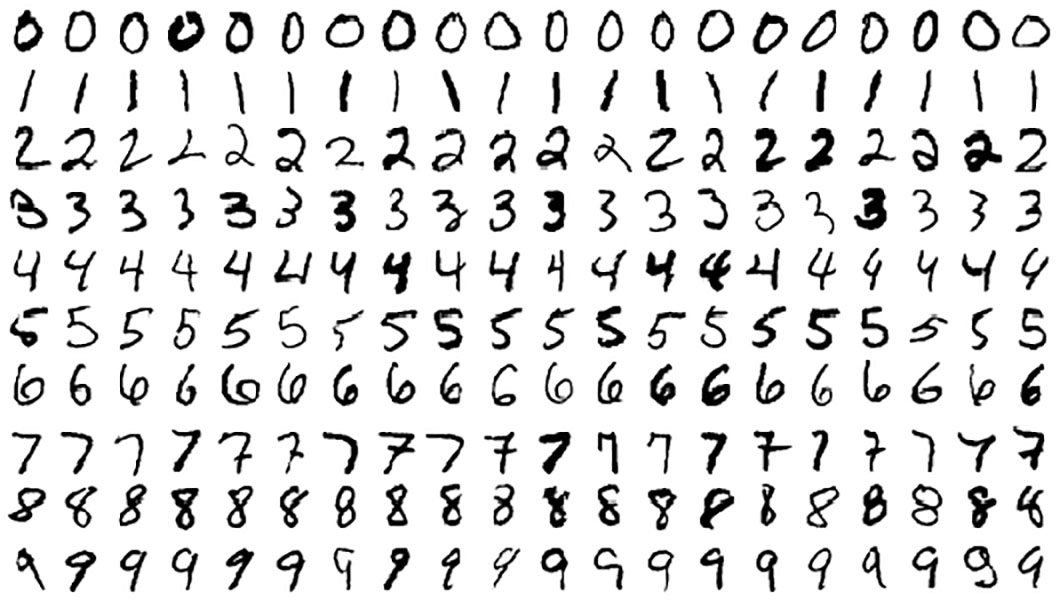
In this guide, we will build an image classification model for the MNIST dataset. MNIST is a dataset consisting of grayscale images of handwritten digits (as seen below); it is commonly used to test image classification models.
The code for this guide can be downloaded here: mnist_pytorch.tgz. After downloading this file, open a terminal window, extract the
file, and cd into the mnist_pytorch directory:
tar xzvf mnist_pytorch.tgz
cd mnist_pytorch
The directory should contain the following files:
├── mnist_pytorch
   ├── adaptive.yaml
   ├── const.yaml
   ├── data.py
   ├── distributed.yaml
   ├── layers.py
   ├── model_def.py
The Python files contain the model and data pipeline definitions. The .yaml files are
configuration files that specify the dataset location, hyperparameters, and the number of batches of
data to use training. The configuration file also tells Determined the entry point, or where the
model class is located. For example, below is the const.yaml file:
name: mnist_pytorch_const
data:
    url: https://s3-us-west-2.amazonaws.com/determined-ai-test-data/pytorch_mnist.tar.gz
hyperparameters:
    learning_rate: 1.0
    global_batch_size: 64
    n_filters1: 32
    n_filters2: 64
    dropout1: 0.25
    dropout2: 0.5
records_per_epoch: 50_000
searcher:
    name: single
    metric: validation_loss
    max_length:
      epochs: 1
    smaller_is_better: true
entrypoint: model_def:MNistTrial
Each YAML file is specific to the type of experiment we will run during this guide:
const.yaml: train a single model on a single GPU or CPU.distributed.yaml: train a single model using multiple GPUs (distributed training).adaptive.yaml: train multiple models as part of a hyperparameter search, using Determined’s adaptive hyperparameter search functionality.
Running Your First Job
The Determined CLI can be used to submit an experiment to the Determined cluster. An experiment is a collection of one or more trials. A trial is a training task that consists of a dataset, a deep learning model, and values for all of the model’s hyperparameters. An experiment can either train a single model (with a single trial) or perform a search over a user-defined hyperparameter space.
We will start by training a single model for a fixed number of batches and with constant values for
all of the hyperparameters. Run the following command in the mnist_pytorch directory:
det experiment create const.yaml .
This command tells Determined to create a new experiment using the const.yaml configuration
file. Determined also needs the directory containing the model code to upload it to the cluster. In
the case above, we run the command in the mnist_pytorch directory, so we tell the CLI to upload
all the files in the current directory by using ..
Once the experiment has been submitted, you should see the following output:
Preparing files (../mnist_pytorch) to send to master... 2.5KB and 4 files
Created experiment 1
We can view the status of the experiment in the WebUI. In a browser, go to http://DET_MASTER/,
where DET_MASTER is the URL or IP address of your Determined cluster. If you installed locally
via det deploy local, this will likely be http://localhost:8080/ . A Determined dashboard
will be displayed similar to the one below:
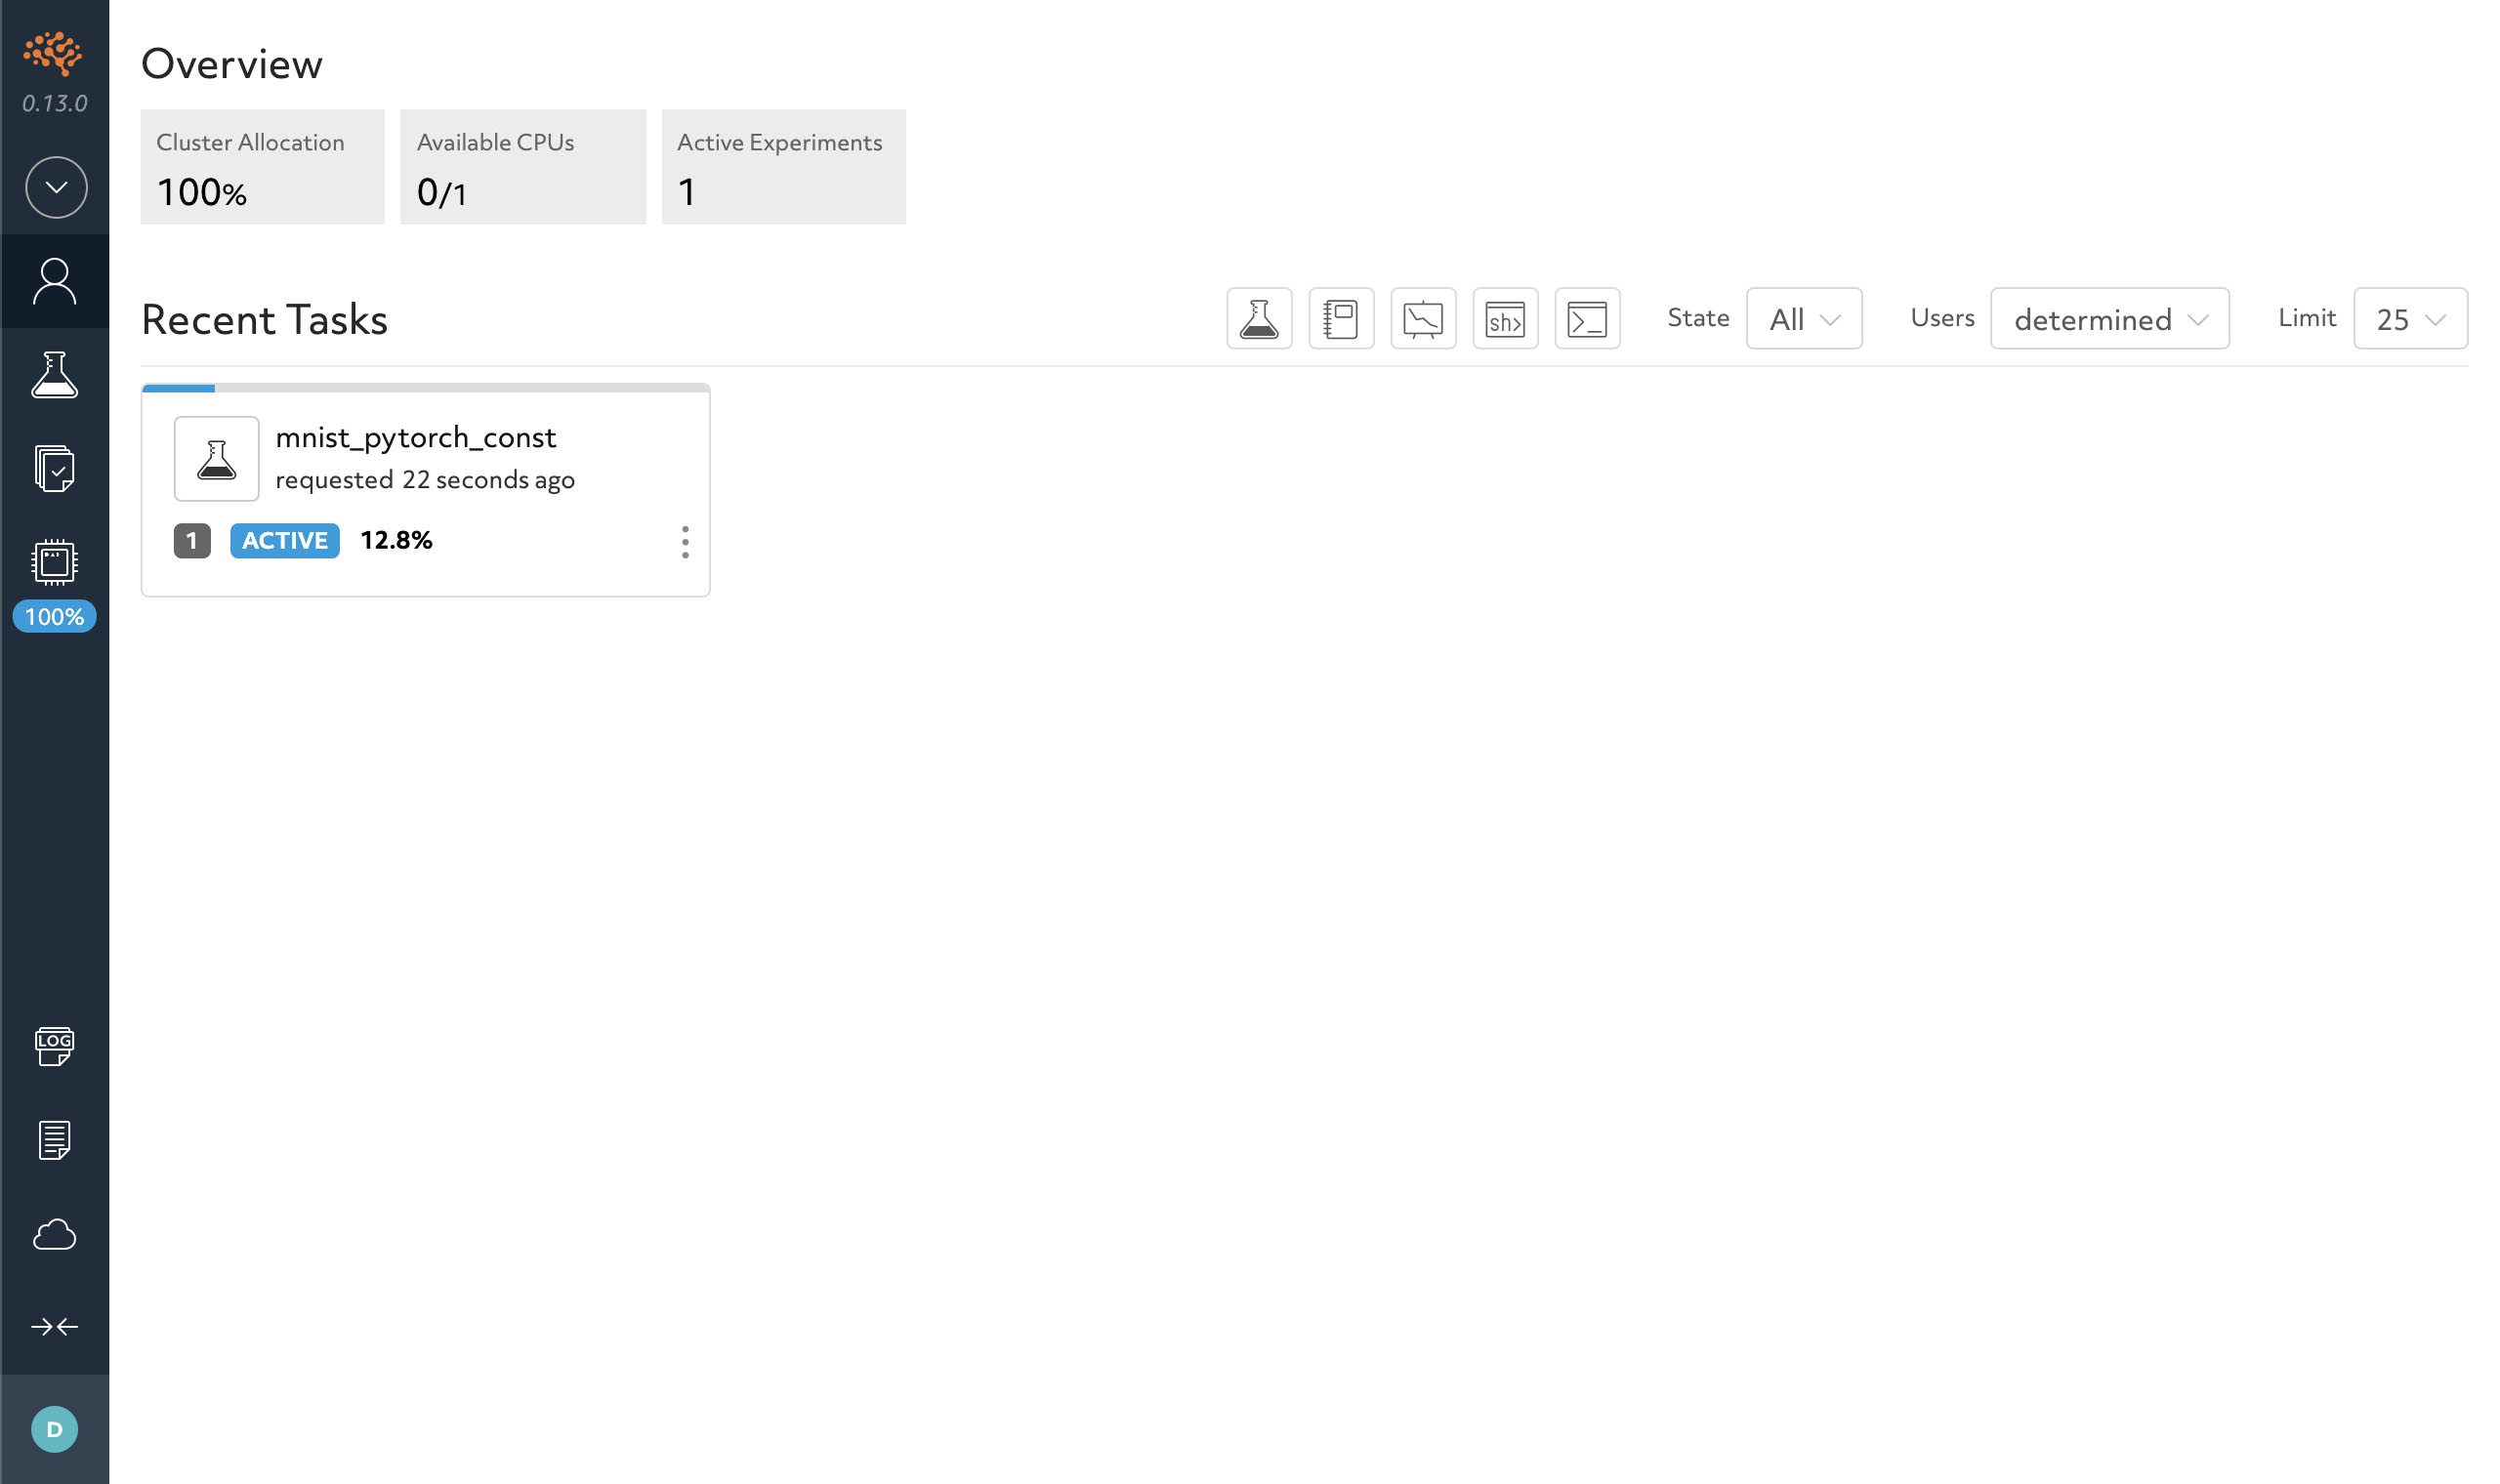
Here, you can see recent tasks, which includes experiments, notebooks, and TensorBoards. We currently have the experiment we just submitted.
Clicking on the experiment takes you to the experiment page similar to below.
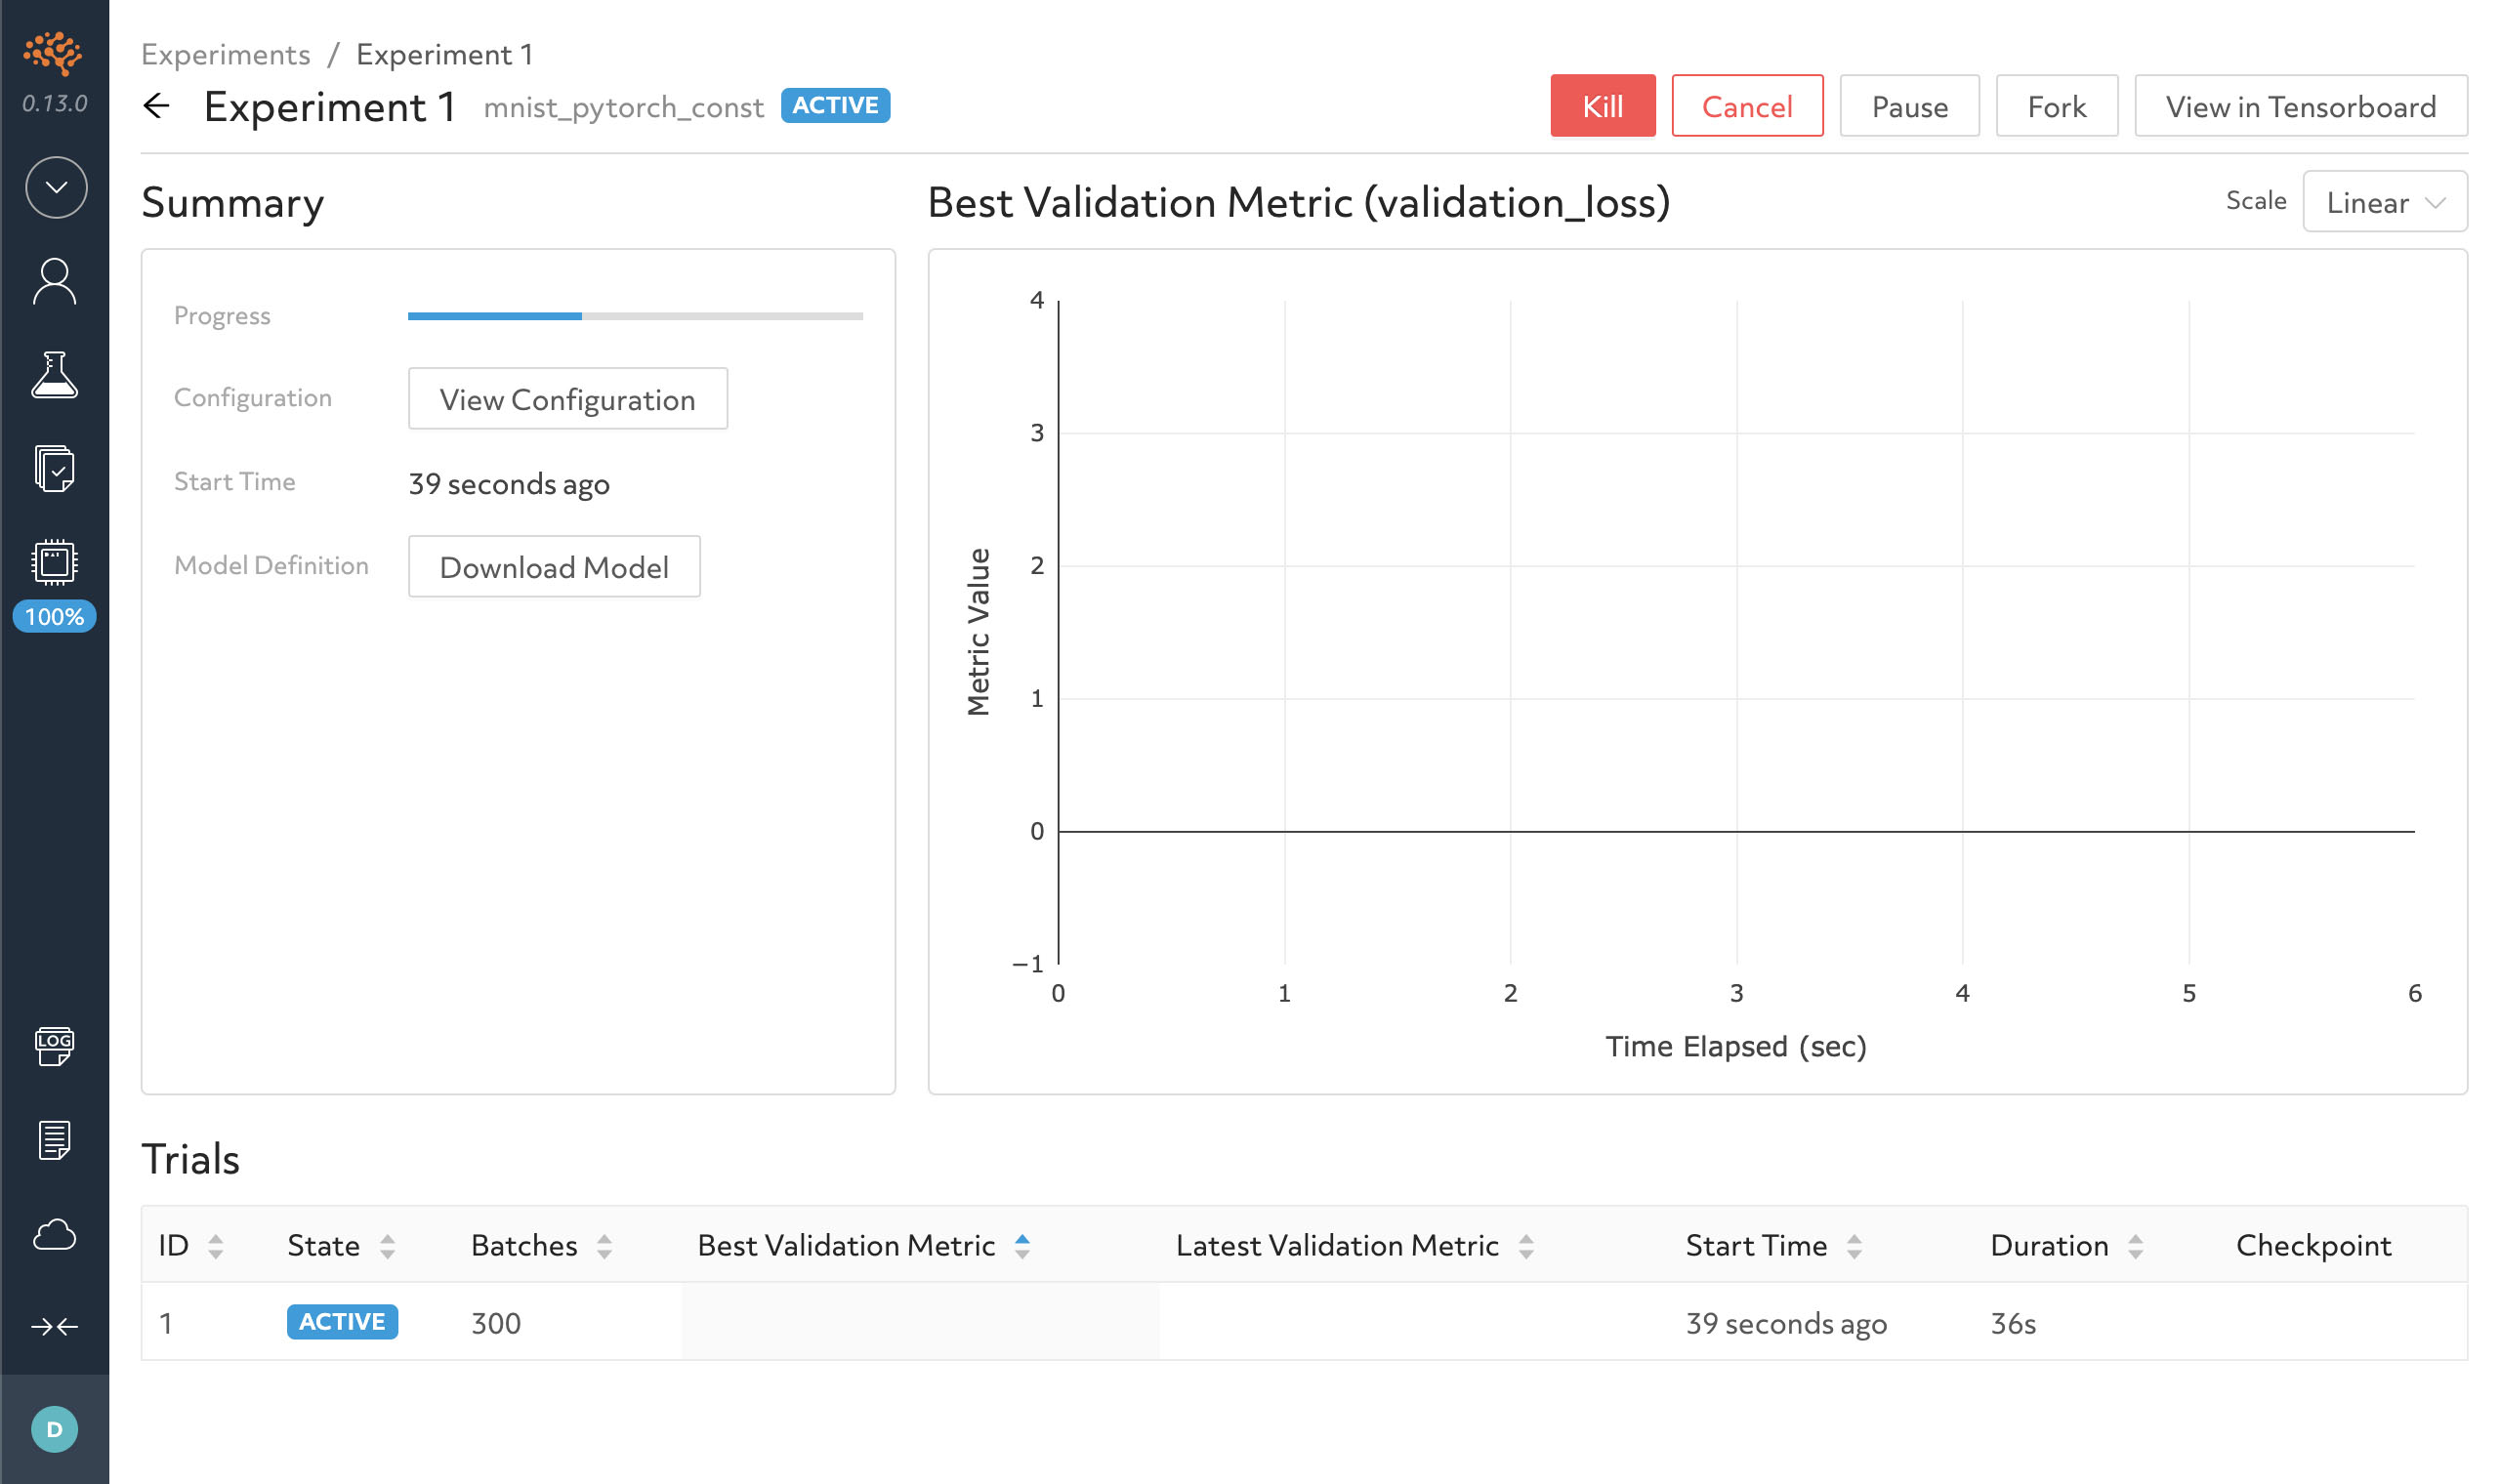
Experiment Page
Determined automatically tracks the metadata associated with all experiments including the hyperparameters, training and validation metrics for each model, and environment configuration. Determined is designed to foster reproducibility and collaboration among your team (or even your future self!).
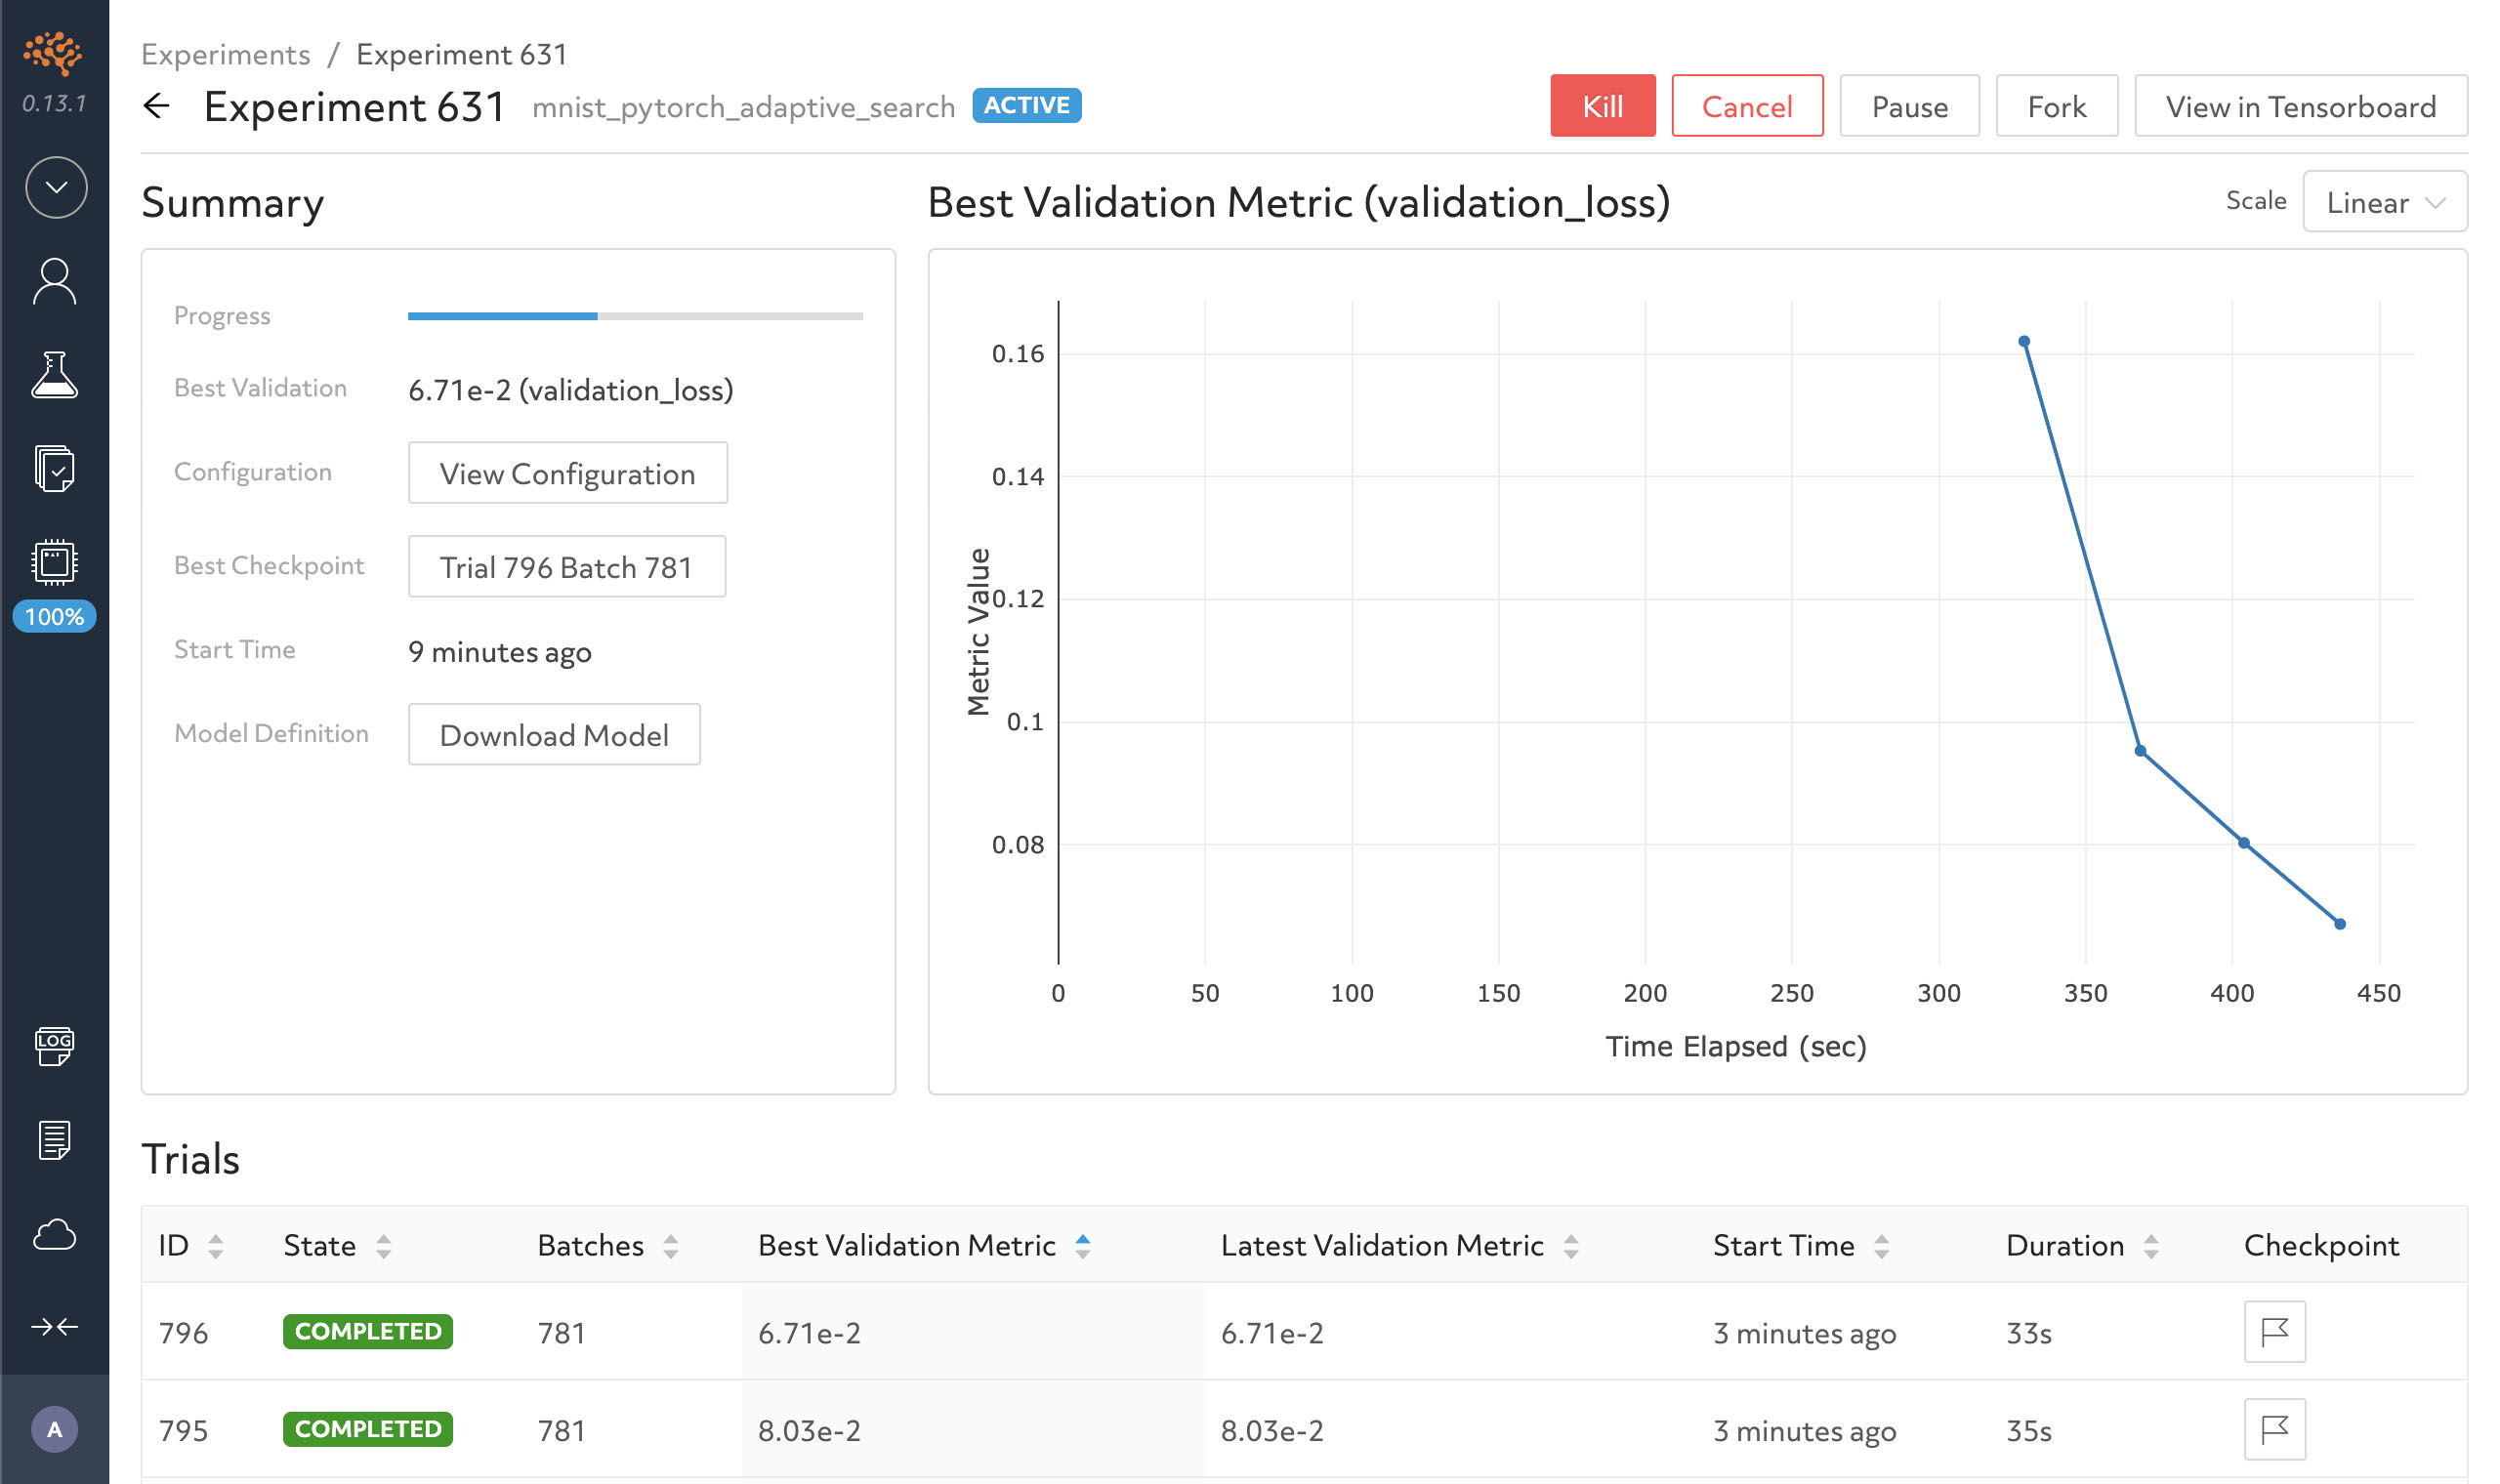
For this experiment, we have one trial because we define all the hyperparameters. We can drill down into a trial to view more information by clicking on it.
A trial page contains detailed information about the model, the configuration, output logs and the training metrics. Typically, you have to code the metric frequency output, plots, and checkpointing while managing the configuration for each model; however, by integrating into Determined’s API, every experiment will automatically have these capabilities without any extra code.
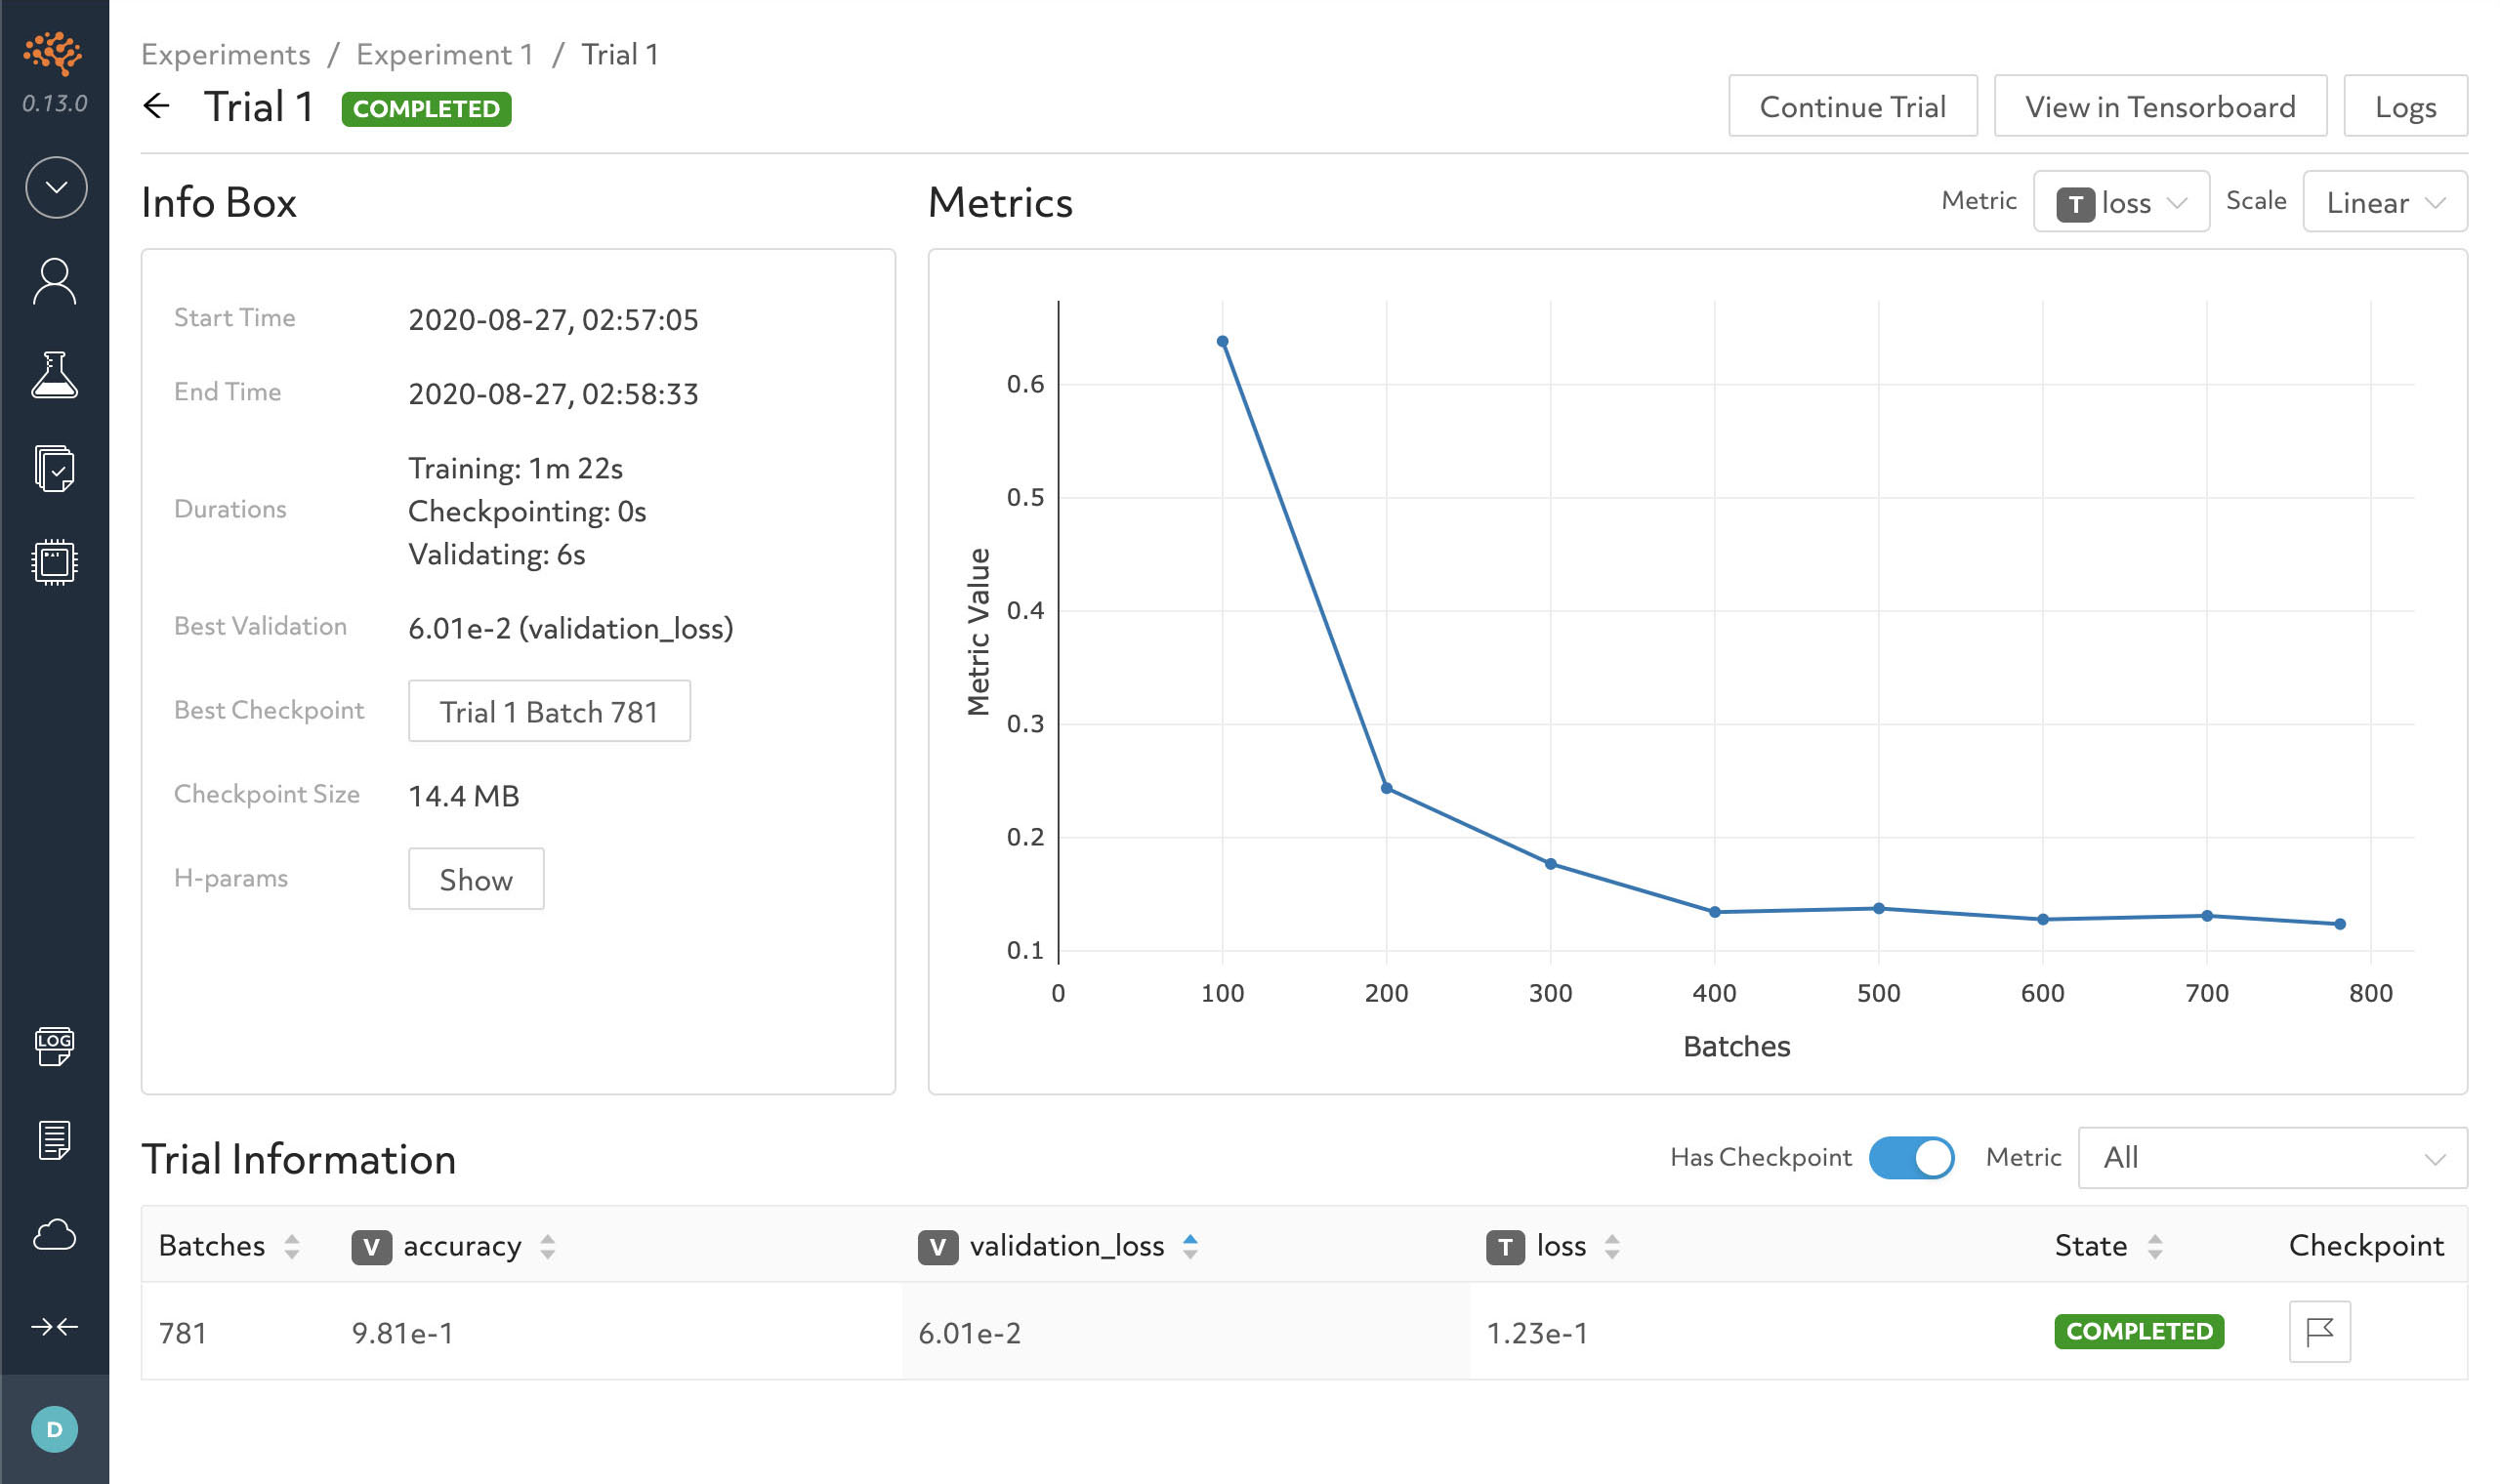
During training, the graph on the right will update with the most current metrics you have defined. In this case, the graph displays the loss and error rate per batch.
Left of the graph displays time information, the hyperparameter configuration, the best validation metric and their respective checkpoint.
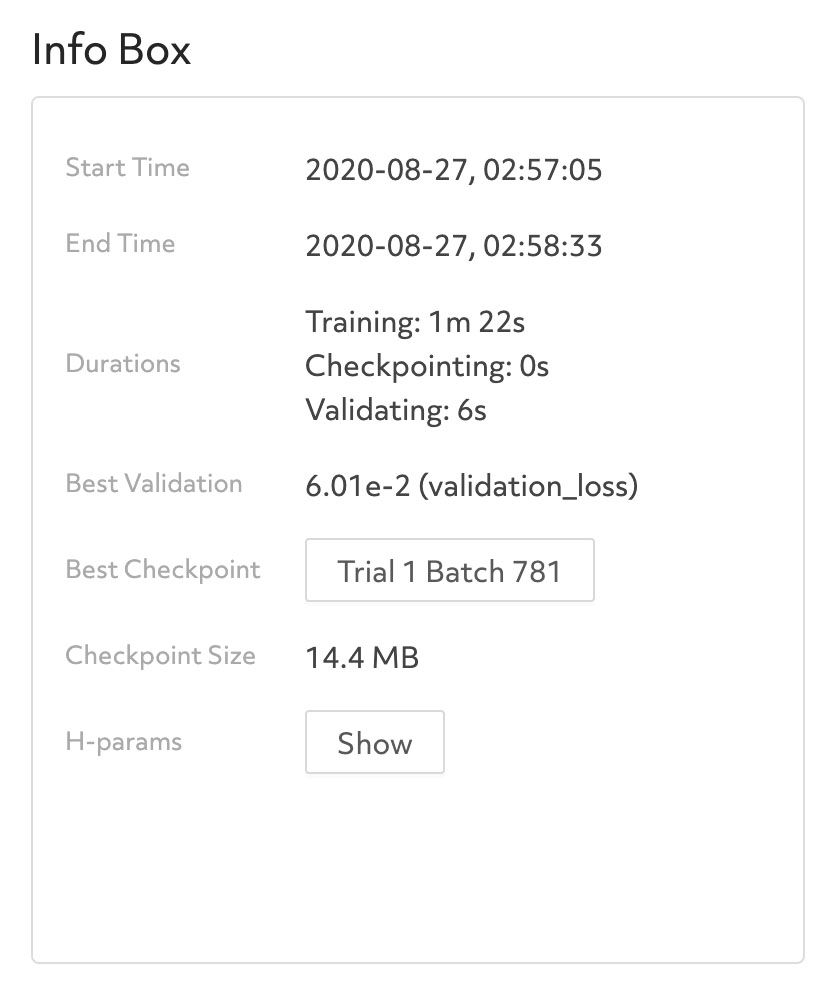
Again, model_def.py does not contain any code to manage the checkpoint and will automatically
checkpoint after calculating metrics on the validation dataset. Once the training has completed, you
can see the total time it took, and the average batch speed. On a typical laptop, it should take
about 5 minutes to train the model to reach 98% accuracy and 0.05 validation loss.
Running a Distributed Training Job
This section requires a Determined cluster with multiple GPUs.
Determined can coordinate multiple GPUs to train a single trial more quickly (distributed training). Distributed training performs best with complex models; therefore, the simple model used in this example may not demonstrate the full benefits of using distributed training.
With Determined, moving from single-GPU training to distributed training is as simple as changing a
single setting in the experiment config file. Specifically, resources.slots_per_trial controls the number of GPUs used to train a single trial. It
is 1 by default; setting it to a larger value enables distributed training. If
slots_per_trial is larger than the number of slots on any single agent machine, you should set
resources.slots_per_trial to a multiple of the number of GPUs in each machine in the cluster.
For example, if your cluster has 8-GPU machines, you should use a value such as 8, 16, 24, etc. If
using a Determined cluster deployed in the cloud, by default each agent will have eight GPUs.
Below is the distributed.yaml file, which is very similar to the const.yaml file except we
now set resources.slots_per_trial.
name: mnist_pytorch
hyperparameters:
  learning_rate: 0.001
  dropout: 0.5
  global_batch_size: 64
  n_filters1: 40
  n_filters2: 40
resources:
  slots_per_trial: 8
records_per_epoch: 50_000
searcher:
  name: single
  metric: validation_error
  max_length:
    epochs: 64
  smaller_is_better: true
entrypoint: model_def:MNistTrial
Next, submit the experiment with the same command as above; however, our experiment configuration
file will now be distributed.yaml:
det experiment create distributed.yaml .
Once again, we access the experiment’s trial in the browser. You will notice the loss curve is very similar to the single GPU experiment we previously ran. However, we reduced the time from 2 minutes and 16 seconds down to 1 minute and 5 seconds.

Tuning the Model
Now that we have trained a model, we want to improve the model’s accuracy through hyperparameter tuning. Typically, this requires a significant amount of time and code. Determined provides support for hyperparameter search through efficient execution of state-of-the-art early-stopping based approaches as well as seamless parallelization of these methods. To use Determined’s hyperparameter search feature, we only have to change the experiment configuration file.
Let’s search over the hyperparameters using the adaptive.yaml experiment configuration file. The
adaptive.yaml file tells the searcher algorithm the ranges to
explore for each hyperparameter. For our model, we will use a fixed batch size and search on the
dropout size, filters, and learning rate. In the searcher field, we update the name to use
adaptive_asha and add max_trials to use 16. This tells Determined which search algorithm
to use and how many model configurations to explore.
Next, run the same command as above to submit an experiment, except change the configuration file to
use adaptive.yaml.
det experiment create adaptive.yaml .
In the browser, navigate to the experiment page. You should notice more trials have started running.
Determined will run the number of max_trials trials and automatically start new trials as
resources become available while the hyperparameter search will stop poor performing trials. On a
typical laptop, 16 trials should take around 10 minutes to train with at least one trial performing
at about 98% validation accuracy.
Once all the trials are completed, we want to evaluate the performance across trials. All Determined
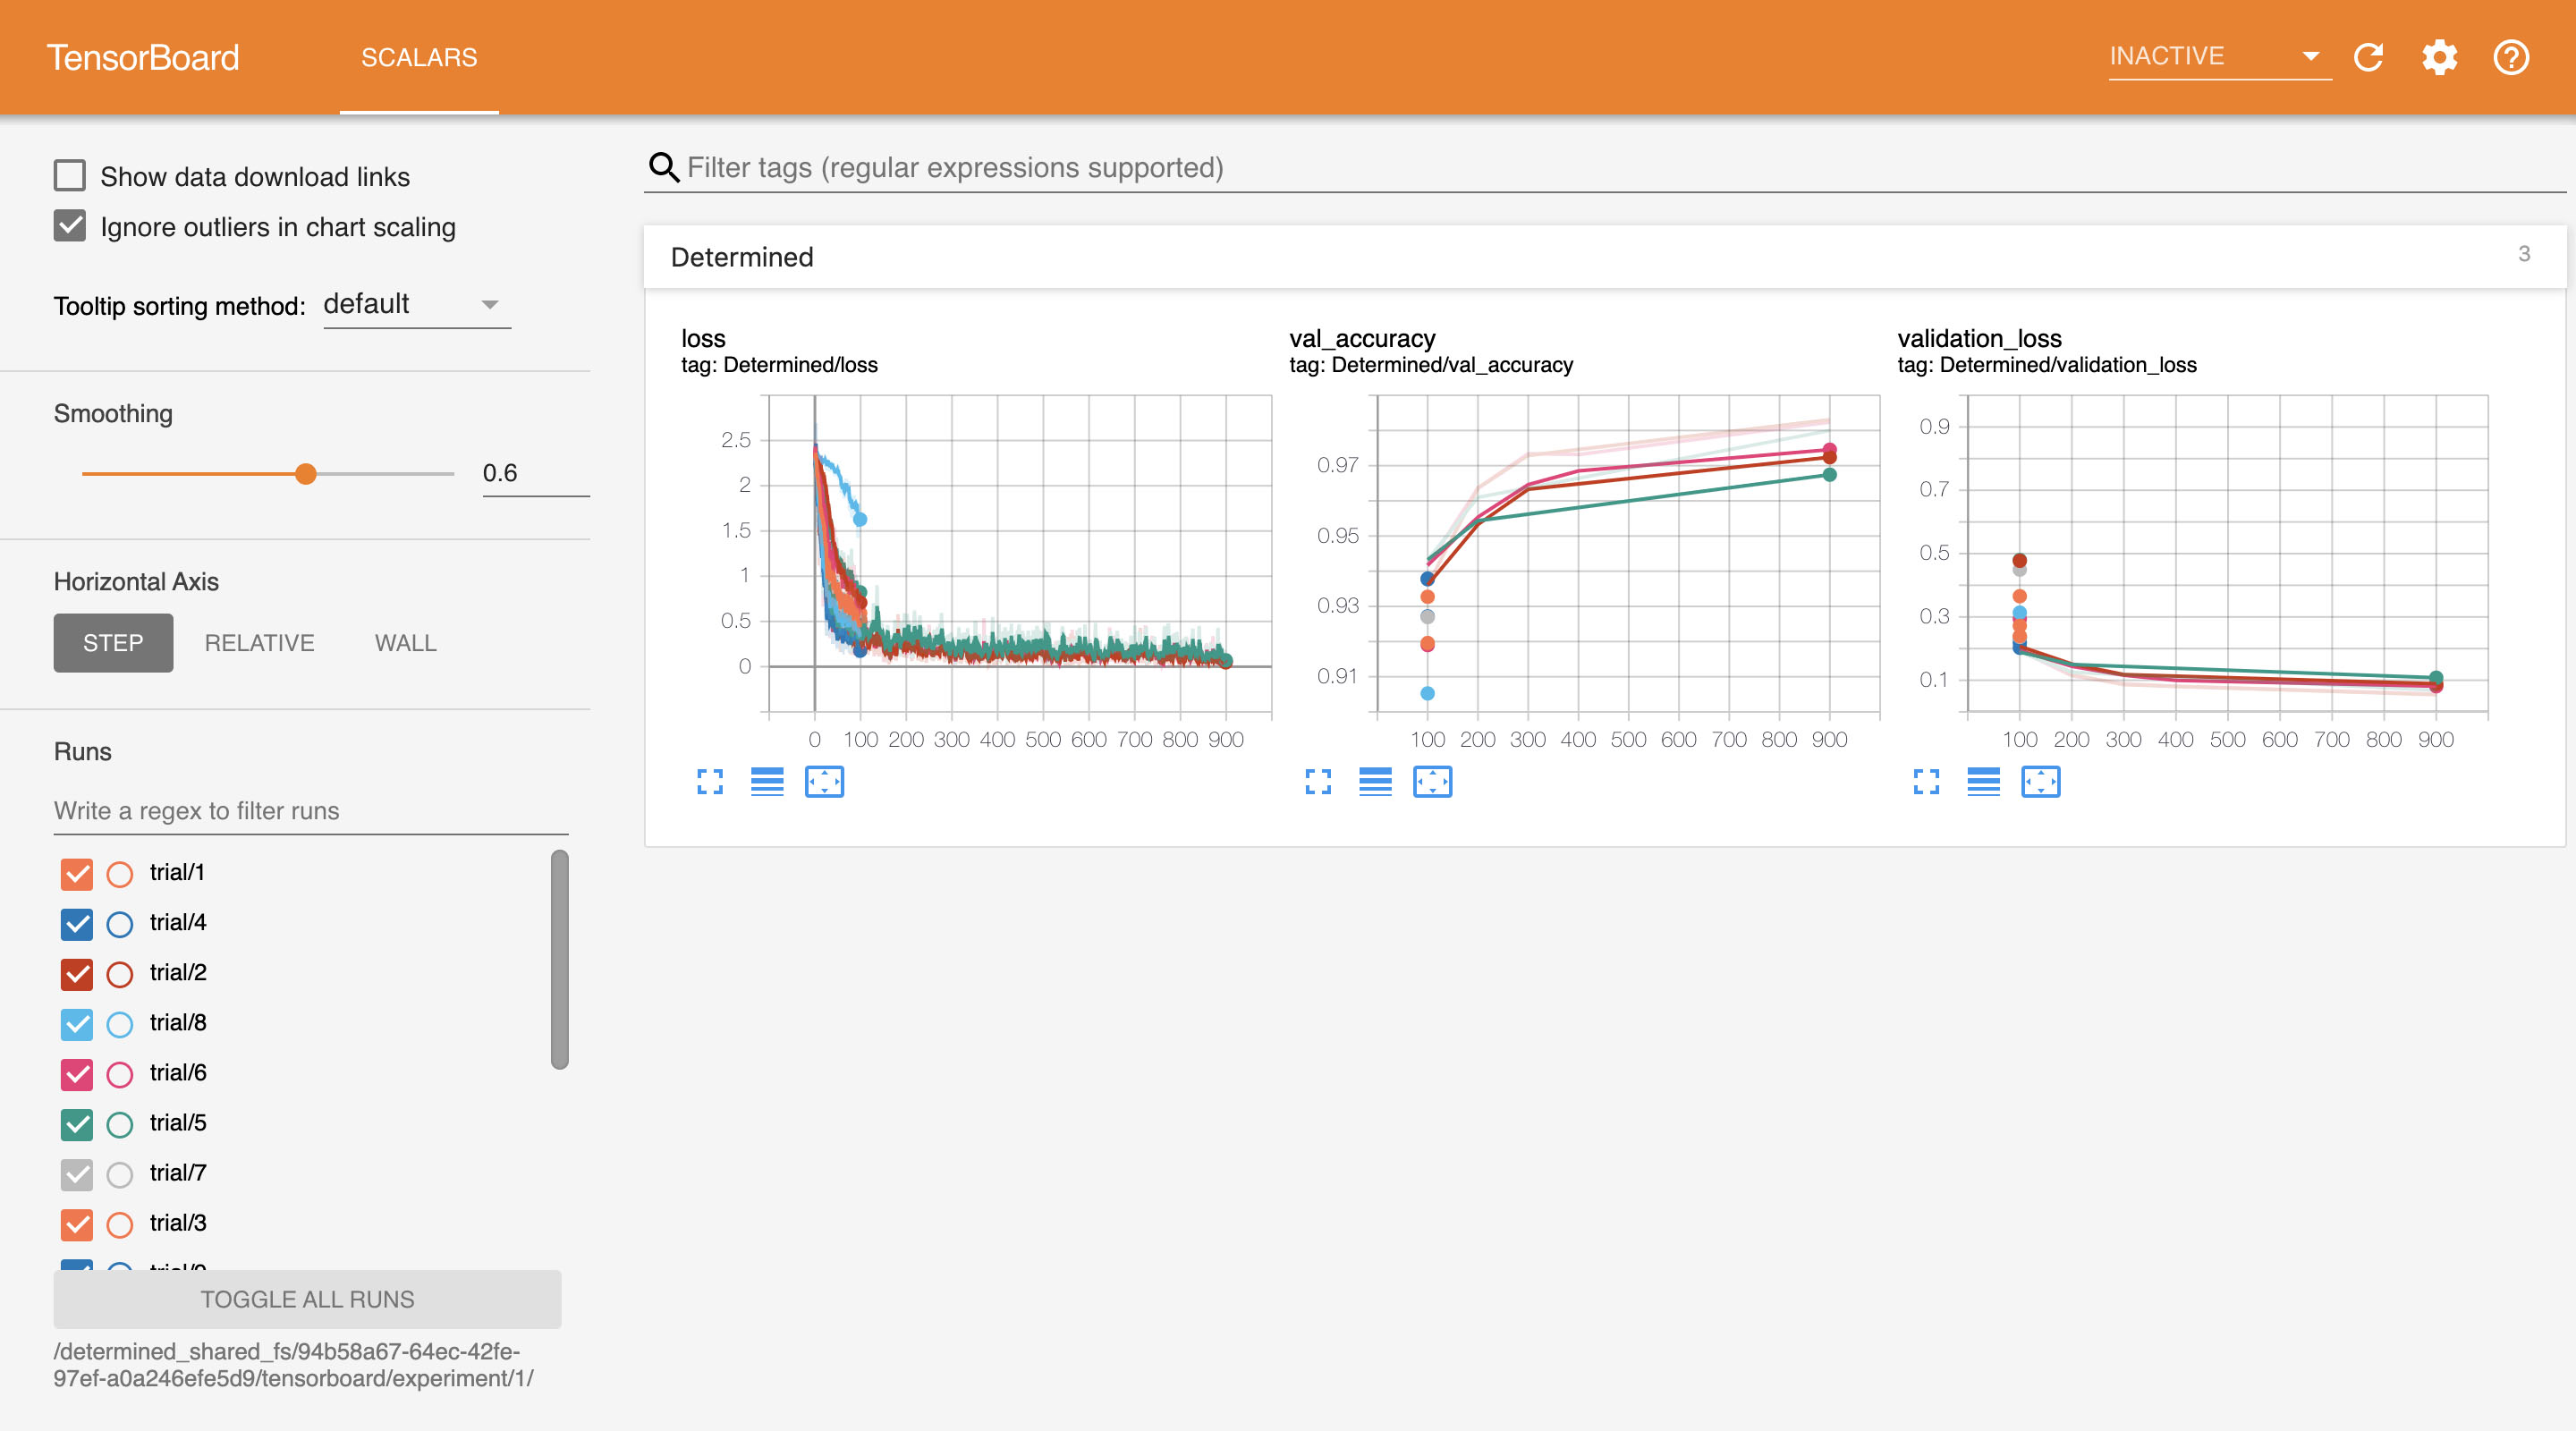
experiments integrate into TensorBoard, without you adding any extra code. On the experiment page,
click TensorBoard on the left hand side.
In TensorBoard, you should see a page similar to below. Determined created TensorBoard plots to show the training loss, validation loss and validation accuracy for each trial for comparison.
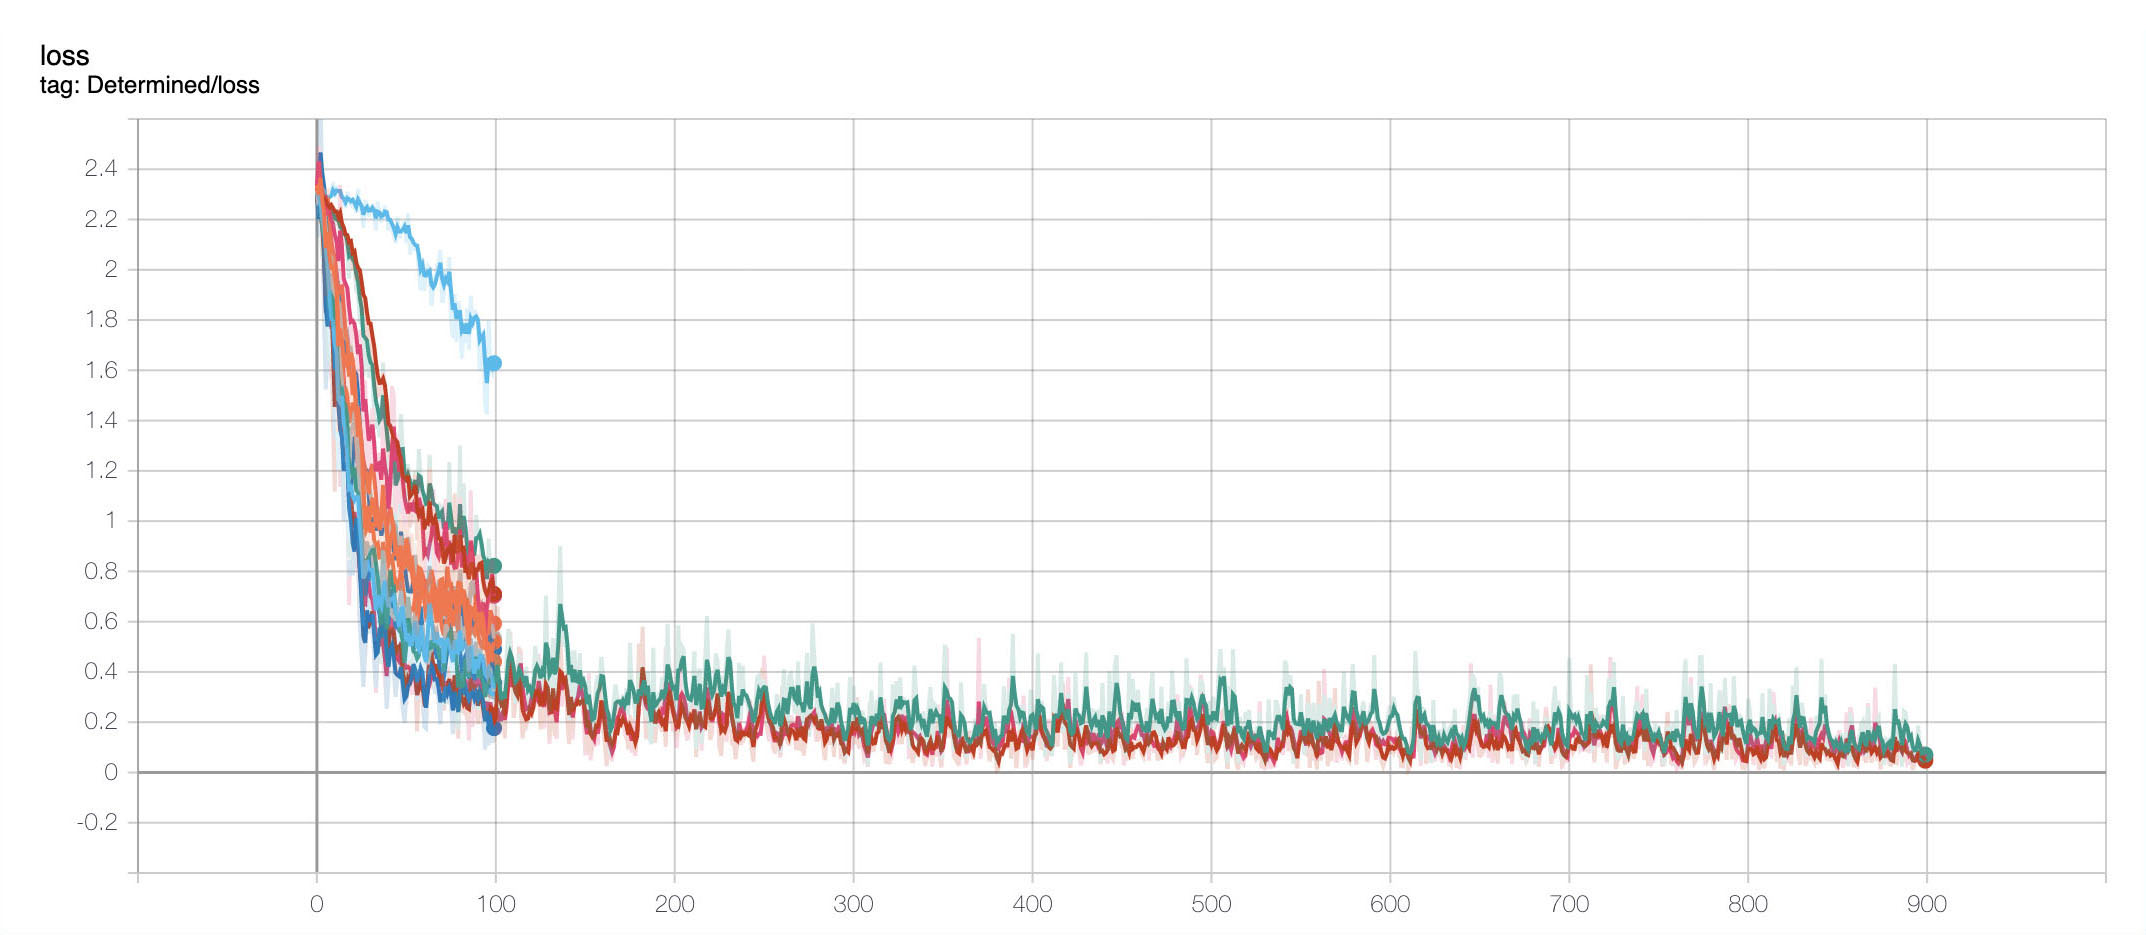
The training loss plot illustrates why certain trials had early-stopping applied. For example, the
graph below shows trial 10 (seen in light blue) had a significantly higher training loss than
the other trials. Due to the notable difference, this trial did not require any extra training.
Next Steps
To begin implementing your first model using PyTorch, go to PyTorch MNIST Tutorial!
If you prefer using TensorFlow, use the TensorFlow Keras Fashion MNIST Tutorial instead.