TensorFlow Keras CNN Tutorial
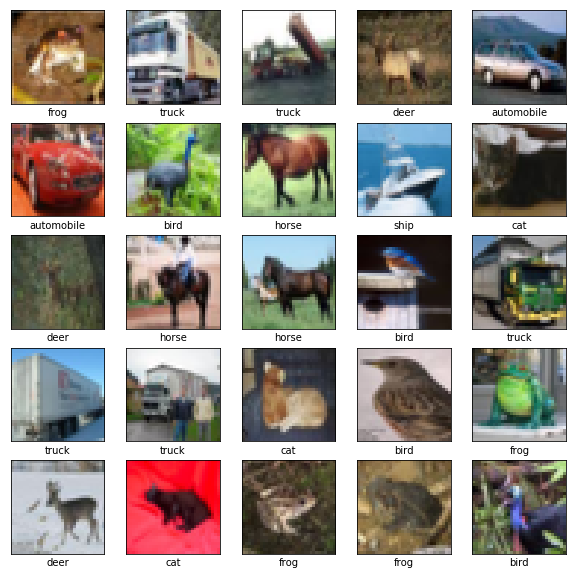
In this tutorial, we show you how to use the Determined API to train an image classifier based on the CIFAR10 image dataset. This tutorial is inspired by the official TensorFlow Convolutional Neural Network Tutorial.
This tutorial requires the Determined CLI. For installation procedures: Install Determined CLI
Contents
Overview
In this tutorial, we will walk you through a Determined implementation of the CIFAR10 image classifier.
Determined requires two functions to build a TensorFlow Keras model:
build_training_data_loaderbuild_validation_data_loaderbuild_model
In our code example, the file main.py contains a TFKerasTrial
implementation with these functions.
To submit an experiment we will also need an experiment configuration file
(const.yaml). The experiment configuration file (*.yaml) contains
information on hyperparameters as well as details on the searcher such as the
metric used for optimization (see Experiment Configuration a full
description). It also features the entrypoint specification which informs
Determined of the location of the trial class in the model definition (see
Model Definitions for more information on specifying an entrypoint).
Implementing the Trial Class
Each Determined experiment expects the implementation of a trial class. This class must inherit from an appropriate base class that corresponds to the framework we would like to use.
In our case, we are using a TFKeras model and thus our trial class subclasses
Determined’s TFKerasTrial class. This trial class requires implementing the
build_training_data_loader, build_validation_data_loader, and
build_model functions.
Implementing the data loaders
To download the CIFAR10 dataset
we the use the dataset API from tf.keras.
from tensorflow.keras import datasets
Downloading the train and validation images with labels fits in a single line of code:
(train_images, train_labels), (validation_images, validation_labels) = datasets.CIFAR10.load_data()
For training, we want to rescale the image RGB values to lie between
0 and 1. We implement a preprocess_data function for this purpose.
def preprocess_data(data):
    return data / 255.0
We also convert the image labels to integers via tf.keras’s
utils.to_categorical feature.
def preprocess_labels(labels):
    return utils.to_categorical(labels)
Next, we need to pass this data to Determined by implementing the
build_training_data_loader and build_validation_data_loader functions
on a trial class. Each returns a batched sequence for training and validation
data, respectively. We can use adapt_keras_data to construct a sequence
from input data, target data, and batch size.
from determined.keras import adapt_keras_data

class CIFARTrial:
    def build_model(self):
        # TODO
        pass

    def build_training_data_loader(self):
        ...
        return adapt_keras_data(
            x=preprocess_data(train_images),
            y=preprocess_labels(train_labels),
            batch_size=batch_size
        )

    def build_validation_data_loader(self):
        ...
        return adapt_keras_data(
            x=preprocess_data(validation_images),
            y=preprocess_labels(validation_labels),
            batch_size=batch_size
        )
Implementing the model
We will use the original tf.keras libraries.
Specifically, we load the layers,
models and utils modules.
from tensorflow.keras import layers, models, utils
We define our model within the CIFARTrial class by implementing the build_model function:
class CIFARTrial(TFKerasTrial):

    def build_model(self):
        model = models.Sequential()
        model.add(layers.Conv2D(32, (3, 3), activation="relu", input_shape=(32, 32, 3)))
        model.add(layers.MaxPooling2D((2, 2)))
        model.add(layers.Conv2D(64, (3, 3), activation="relu"))
        model.add(layers.MaxPooling2D((2, 2)))
        model.add(layers.Conv2D(64, (3, 3), activation="relu"))

        model.add(layers.Flatten())
        model.add(layers.Dense(64, activation="relu"))
        model.add(layers.Dense(10, activation="softmax"))

        model = self.context.wrap_model(model)

        model.compile(
            optimizer="adam", loss="categorical_crossentropy", metrics=["categorical_accuracy"],
        )
        return model
Training the Model
Lastly, we specify our hyperparameters
and the optimization metric in our experiment
configuration *.yaml file.
description: CIFAR10_keras_const
hyperparameters:
  global_batch_size: 32
searcher:
  name: single
  metric: val_categorical_accuracy
  max_steps: 50
min_validation_period: 10
entrypoint: main:CIFARTrial
In this simple example, we only set one hyperparameter, which is
batch size = 32. We will not be using any hyperparameters tuning
and thus our searcher is single. We use val_categorical_accuracy
as our searcher metric because CIFAR10 is a classification problem.
We run the experiment for a total of 50 steps.
In Determined, the runtime of an experiment is defined in steps instead of
epochs. Each step consists of 100 batches. Thus, in our example, with
batch size equal to 32 and 50 steps, we run through a total of
32*50*100 = 160k samples. Finally, min_validation_period specifies
after how many steps
we compute validation metrics.
Now that the experiment configuration is set up, we are ready to run our experiment with a single command:
det experiment create const.yaml .
Here, the first argument (const.yaml)
specifies the experiment configuration file
and the second argument (.) the location of
the directory that contains our model definition files.
Once the experiment is started, you will see a notification like this:
Preparing files (/cifar10_cnn_tf_keras) to send to master... 3.2KB and 4 files
Created experiment xxx
Activated experiment xxx
Evaluating the Model
Thanks to Determined, model evaluation is done automatically for you.
To access information on both training and validation performance,
simply go to the webUI by entering the address of your DET_MASTER
in your web browser.
Once you are on the Determined landing page, you can find your experiment either via the experiment ID (xxx) or via its description.
Code Sample
Putting it all together, our main.py file looks like this.
from typing import Any, Dict, List, Tuple
from tensorflow.keras import datasets, layers, models, utils
from determined.keras import TFKerasTrial, adapt_keras_data

def preprocess_data(data):
    return data.astype("float32") / 255

def preprocess_labels(labels):
    return utils.to_categorical(labels)

class CIFARTrial(TFKerasTrial):
    def build_model(self):

        model = models.Sequential()
        model.add(layers.Conv2D(32, (3, 3), activation="relu", input_shape=(32, 32, 3)))
        model.add(layers.MaxPooling2D((2, 2)))
        model.add(layers.Conv2D(64, (3, 3), activation="relu"))
        model.add(layers.MaxPooling2D((2, 2)))
        model.add(layers.Conv2D(64, (3, 3), activation="relu"))

        model.add(layers.Flatten())
        model.add(layers.Dense(64, activation="relu"))
        model.add(layers.Dense(10, activation="softmax"))

        model.compile(
            optimizer="adam", loss="categorical_crossentropy", metrics=["categorical_accuracy"],
        )

        return model

def build_training_data_loader(self):
    (train_images, train_labels), (_, _) = datasets.cifar10.load_data()
    batch_size = self.context.get_per_slot_batch_size()
    return adapt_keras_data(
        x=preprocess_data(train_images),
        y=preprocess_labels(train_labels),
        batch_size=batch_size,
    )

def build_validation_data_loader(self):
    (_, _), (test_images, test_labels) = datasets.cifar10.load_data()
    batch_size = self.context.get_per_slot_batch_size()
    return adapt_keras_data(
        x=preprocess_data(test_images),
        y=preprocess_labels(test_labels),
        batch_size=batch_size,
    )
A similar example is available at
CIFAR-10 CNN.